Archive: October 30, 2024

hamilton beach slow cooker user manual

Welcome to the Hamilton Beach Slow Cooker User Manual! This guide will help you understand and use your new appliance to prepare delicious meals effortlessly. Get started today!

1.1 Overview of the Hamilton Beach Slow Cooker

The Hamilton Beach Slow Cooker is a versatile kitchen appliance designed for convenient, hands-off cooking. Perfect for preparing hearty meals, it offers programmable settings and digital controls for effortless meal preparation. Whether you’re cooking for a family or entertaining guests, this slow cooker ensures delicious, perfectly cooked dishes every time. Dive into this guide to make the most of your new kitchen companion!

1.2 Importance of Reading the Manual

Reading this manual is essential to ensure safe and effective use of your Hamilton Beach Slow Cooker. It provides vital information on operation, safety, and maintenance, helping you maximize its features and troubleshoot common issues. Taking the time to read through this guide will enhance your cooking experience and prolong the lifespan of your appliance.

Safety Precautions

Safety is paramount when using your Hamilton Beach Slow Cooker. Always follow guidelines to avoid burns, electrical hazards, and improper usage. Handle with care for optimal performance and longevity.

2.1 General Safety Guidelines

Always keep the slow cooker out of children’s reach and ensure the area around it is clear to prevent accidents. Use oven mitts when handling the hot lid and stoneware. Avoid overloading the cooker to prevent spills. Place it on a stable, heat-resistant surface and never leave it unattended while in use. Additionally, avoid using abrasive cleaners and keep the power cord away from heat sources to maintain safety and longevity.

2.2 Electrical Safety Tips

Always plug the slow cooker into a grounded electrical outlet to prevent shocks. Avoid using damaged cords or loose plugs, as they can cause electrical hazards. Never submerge the electrical base in water or expose it to excessive moisture. Keep the appliance away from flammable materials and ensure proper ventilation. Do not use it near water sources or in humid environments to avoid electrical risks. Additionally, avoid overloading the outlet and ensure the slow cooker is the only appliance connected to the outlet to maintain electrical safety. Regularly inspect the power cord for damage and replace it if necessary to prevent potential hazards. Always follow the manufacturer’s guidelines for electrical connections and avoid using extension cords unless absolutely necessary, ensuring they are rated for the slow cooker’s power consumption. By adhering to these electrical safety tips, you can ensure safe and reliable operation of your Hamilton Beach Slow Cooker.

2.3 Handling and Usage Precautions

Always use oven mitts or tongs to handle hot cookware. Avoid sudden temperature changes to prevent cracking. Keep children away from the slow cooker while it’s in use. Never leave the appliance unattended during operation. Ensure the lid is securely closed to maintain even heating. Avoid using abrasive cleaners or scouring pads, as they may damage the finish. For safe handling, always grip the cookware by the handles. Regularly inspect the slow cooker for damage before use. Do not immerse the electrical base in water or expose it to steam. Always follow the recommended cooking times and temperatures to prevent food from burning or the slow cooker from overheating. By adhering to these precautions, you can ensure safe and effective use of your Hamilton Beach Slow Cooker.

Product Features

The Hamilton Beach Slow Cooker offers a modern design with an easy-to-use interface, multiple cooking settings, and a spacious cooking capacity. Its programmable timer and automatic keep-warm function ensure perfectly cooked meals every time, making it a versatile addition to your kitchen.

3.1 Key Components of the Slow Cooker

The Hamilton Beach Slow Cooker includes a durable ceramic crock, a secure-fitting lid, an easy-to-use control panel, and robust heating elements. The crock is removable for convenient cleaning, while the lid features a locking mechanism to prevent spills during transport. The control panel offers intuitive buttons for selecting settings, and the heating elements ensure consistent cooking temperatures. The handles are designed for safe and easy carrying.

3.2 Available Settings and Modes

The Hamilton Beach Slow Cooker offers multiple settings and modes to suit various cooking needs. Choose from Manual, Timer, or preset modes like Stew, Soup, or Keep Warm. Adjust the temperature to low, medium, or high, and set the timer up to 24 hours. The digital display makes it easy to customize settings, ensuring perfect results for any recipe. Explore these features for versatile cooking experiences.

3.3 Special Features for Convenience

The Hamilton Beach Slow Cooker includes features like a digital display, clip-tight lid for spill-proof transport, and automatic shut-off. The cooker also has a keep-warm function, programmable timer, and dishwasher-safe parts. These features ensure ease of use, portability, and maintenance, making it ideal for busy households and on-the-go meals. Enhanced convenience at your fingertips!

Installation and Setup

Ensure proper installation by carefully unpacking, inspecting, and placing the slow cooker on a stable, heat-resistant surface. Plug in the unit and verify all components are securely assembled.

4.1 Unpacking and Inspecting the Slow Cooker

Excited to start? Carefully unpack the slow cooker and inspect for any damage. Ensure all components, including the stoneware, lid, and power cord, are included and free from defects. Review the manual to familiarize yourself with the parts. If anything is missing or damaged, contact customer support immediately before proceeding.

4.2 Placing the Slow Cooker on a Stable Surface

Place the slow cooker on a flat, heat-resistant surface, away from children and pets. Ensure the area is well-ventilated and avoid placing it near flammable materials. The surface should be even to prevent tipping. Keep the slow cooker at least 6 inches away from walls or other objects to allow proper airflow and reduce the risk of overheating.

4.3 Initial Setup and Testing

Plug in the slow cooker and ensure all components are securely in place. Perform a test run by filling the stoneware with water and setting the cooker to the lowest heat setting. Allow it to run for 30 minutes to ensure proper heating and function. This step confirms everything is working correctly before first use.

Operating Instructions

Learn to operate your Hamilton Beach Slow Cooker with ease. This section covers using the control panel, setting the timer, adjusting temperatures, and monitoring your cooking progress.

5.1 Understanding the Control Panel

The control panel features intuitive buttons and an LCD display for easy operation. Use the buttons to select modes, adjust cooking time, and set temperatures. The display shows real-time status, ensuring precise control over your cooking process. Familiarize yourself with each function to optimize your slow cooker experience and achieve perfect results every time.

5.2 Setting the Timer and Temperature

Use the designated buttons to set your desired cooking time and temperature. Press the Temperature button to cycle through Low, Medium, High, or Warm settings. Adjust the timer using the Timer button, and confirm with Start. The LCD display will show your selections. Ensure settings match your recipe for optimal results. Precise control guarantees perfectly cooked dishes every time.

5.3 Starting and Monitoring the Cooking Process

Once settings are confirmed, press the Start button to begin cooking. The LCD display will show active status. Avoid opening the lid excessively to maintain heat and moisture. Use the lid holder for safe handling. Periodically check progress through the transparent lid. After cooking ends, the cooker automatically switches to Warm mode to keep food ready to serve. Monitor progress for optimal results.

Usage Tips and Care

For optimal performance, avoid using abrasive cleaners or metal utensils. Ensure the cooker is placed on a stable, heat-resistant surface. Regularly clean residue buildup and follow care guidelines outlined in the manual for longevity. Proper usage ensures safe, efficient, and delicious cooking experiences with your Hamilton Beach Slow Cooker.

6.1 Best Practices for Slow Cooking

For exceptional slow-cooked meals, layer ingredients properly, with tougher cuts of meat at the bottom. Use the recommended liquid levels to avoid under or over-cooking. Avoid overfilling the cooker, as this can lead to uneven cooking. Opt for low settings for tenderizing tougher meats and high settings for quicker results. Always brown meats before slow cooking for enhanced flavor. Monitor cooking times to ensure dishes are perfectly cooked and avoid overcooking, which can make food dry. Experiment with spices and seasonings to develop rich flavors. Keep the lid closed during cooking to retain heat and moisture. This ensures consistent results and prevents food from drying out. Slow cooking is ideal for stews, braises, and roasts, making it a versatile option for a variety of meals. By following these practices, you can achieve delicious, flavorful dishes every time.

6.2 Food Preparation Guidelines

Chop vegetables uniformly for even cooking. Brown meats beforehand for enhanced flavor. Ensure ingredients are at room temperature before cooking. Avoid overloading the cooker. Use recommended liquid levels to prevent dryness. Season foods liberally but adjust salt and pepper as needed. Add delicate ingredients like dairy or herbs toward the end of cooking to maintain texture and flavor. This ensures a balanced and delicious meal every time.

6.4 Tips for Achieving Optimal Results

  • Layer ingredients properly, placing denser foods at the bottom and delicate items on top.
  • Use the correct liquid levels to ensure even cooking without dryness.
  • Monitor temperature settings to avoid overcooking or undercooking.
  • Stir occasionally for uniform flavor distribution.
  • Keep the lid closed to retain heat and moisture.
  • Plan cooking time accurately based on ingredient quantities.
  • Experiment with spices and seasonings for personalized flavor profiles.

Cleaning and Maintenance

Regularly clean the slow cooker to maintain performance. Wash removable parts with mild detergent and warm water. Dry thoroughly to prevent water spots and bacterial growth.

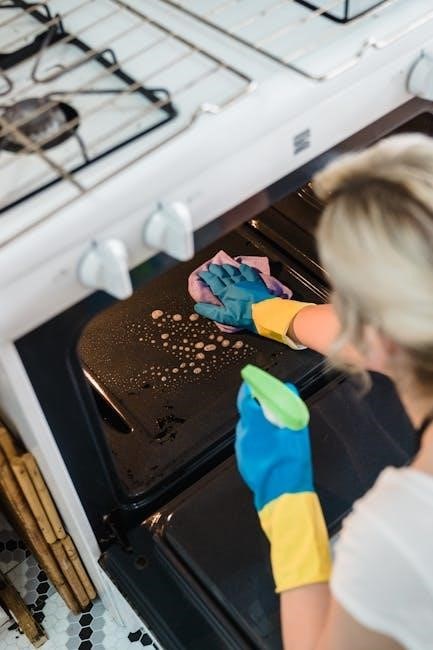
7.1 Cleaning the Slow Cooker After Use

After each use, unplug the slow cooker and allow it to cool slightly. Remove the stoneware insert and glass lid, washing them with warm soapy water. Use a soft sponge to clean the exterior and base, avoiding abrasive cleaners. Dry all parts thoroughly to prevent water spots and bacterial growth. Regular cleaning ensures optimal performance and longevity.

7.2 Deep Cleaning and Descaling

For deep cleaning, mix equal parts water and white vinegar in the stoneware insert. Set the slow cooker to low for 2 hours to loosen tough stains. Scrub the interior with a non-abrasive sponge, then rinse thoroughly. For descaling, soak the insert in a descaling solution if mineral buildup occurs. Avoid harsh chemicals to maintain the cooker’s finish and functionality over time.

7.3 Maintenance Tips for Longevity

Regularly clean the slow cooker after each use to prevent food residue buildup. Avoid using metal utensils or abrasive cleaners, as they may scratch the surfaces. Always dry the cooker thoroughly after washing to prevent rust or mold. Store the unit in a cool, dry place when not in use. Check the power cord periodically for signs of wear and tear to ensure safe operation.

Troubleshooting Common Issues

Identify and resolve issues like uneven cooking, lid seal problems, or malfunctioning controls. Refer to the manual for solutions or contact customer support if needed.

8.1 Identifying and Solving Common Problems

If your slow cooker isn’t turning on, check the power connection. For uneven cooking, ensure the lid is sealed properly. If food is undercooked, extend the cooking time. Clean any food residue to prevent odor issues. Refer to the manual for detailed solutions or contact customer support for persistent problems. Troubleshooting ensures optimal performance and longevity of your appliance.

8.2 Resetting the Slow Cooker

To reset your Hamilton Beach slow cooker, press and hold the power button for 10 seconds. This action will restore the appliance to its factory settings. Ensure the device is unplugged before attempting a reset for safety. If issues persist after resetting, consult the troubleshooting section or contact customer support for further assistance.

8.3 When to Contact Customer Support

Contact Hamilton Beach customer support if your slow cooker experiences persistent issues despite troubleshooting. This includes the device not turning on, uneven heating, or malfunctioning controls. Before reaching out, ensure you have your model number and a detailed description of the problem. Visit their official website or call their support hotline for professional assistance and guidance.

Warranty Information

Welcome to the warranty section. This part outlines the coverage and support provided by Hamilton Beach for your slow cooker, ensuring peace of mind for your purchase;

9.1 Understanding the Warranty Terms

Your Hamilton Beach Slow Cooker is backed by a limited warranty covering manufacturing defects. The standard warranty period is one year from the date of purchase. This warranty protects against defects in materials and workmanship but does not cover misuse, normal wear, or accidental damage. Retain your purchase receipt as proof of ownership when filing a claim.

9.2 Registering Your Product

Register your Hamilton Beach Slow Cooker online to ensure warranty validation and receive product updates. Visit the official Hamilton Beach website, navigate to the warranty section, and provide your product’s model and serial number along with purchase details. Registration helps streamline customer support and ensures you stay informed about product enhancements and services.

9.3 Filing a Warranty Claim

To file a warranty claim, visit the Hamilton Beach website and navigate to the warranty section. Provide your product’s model and serial number, along with proof of purchase and a detailed description of the issue. Once submitted, a representative will review your claim and contact you to resolve the matter promptly. Ensure all information is accurate for a smooth process.

Optional Accessories

Discover optional accessories designed to enhance your slow cooking experience, such as cookware, utensils, and more. Explore the possibilities to maximize your culinary creativity effortlessly.

10.1 Recommended Accessories for Enhanced Use

Enhance your slow cooking experience with recommended accessories like non-stick liners for easy cleanup, stoneware cookware for even heating, and silicone utensils for safe serving. A programmable serving spoon and a cookbook with slow cooker recipes can also elevate your cooking convenience and creativity. Visit the official Hamilton Beach website or authorized retailers to explore these accessories.

10.2 Where to Purchase Accessories

Accessories for your Hamilton Beach Slow Cooker are available on the official Hamilton Beach website, authorized retailers like Amazon, Best Buy, or Walmart. You can also check local kitchenware stores or home goods retailers. For authenticity, ensure purchases are made from verified sellers. Contact customer service for assistance in locating specific accessories or for recommendations on trusted retailers.

Storage Instructions

Store your Hamilton Beach Slow Cooker in a cool, dry place. Ensure all parts are clean and dry before storing. Avoid stacking heavy objects on the cooker.

11.1 Proper Storage When Not in Use

When storing your Hamilton Beach Slow Cooker, ensure it is clean and dry. Place it in a cool, dry location away from direct sunlight. Avoid stacking heavy items on the cooker. Store the power cord separately, wrapping it neatly to prevent tangling. Do not leave the cooker outdoors or in humid environments. Proper storage will help maintain its performance and longevity.

11.2 Tips for Long-Term Storage

For extended periods, store your Hamilton Beach Slow Cooker in a dry, cool place. Cover it to protect from dust. Use the original packaging if available. Ensure all components, including the lid and cord, are stored together. Avoid extreme temperatures or humidity, as this can damage electrical parts. Proper long-term storage will preserve your cooker’s condition and functionality for future use.

12.1 Final Tips for Enjoying Your Slow Cooker

Experiment with ingredients, layer flavors, and explore diverse recipes. Regular cleaning maintains performance. Store properly when not in use. Try international dishes, desserts, or appetizers. Share recipes online to inspire others. Happy cooking!

12.2 Encouragement to Explore New Recipes

Don’t be afraid to experiment with new flavors and ingredients! Your slow cooker is versatile—try soups, stews, roasts, or even desserts; Explore global cuisines or create your own signature dishes. Share your creations and discover inspiration online. Cooking is a journey, and your slow cooker is the perfect companion for endless culinary adventures. Enjoy the process!

PDF

icespire peak pdf

Dragon of Icespire Peak is an introductory Dungeons & Dragons adventure from the Essentials Kit‚ designed for 1-5 players. This free PDF offers a starter experience with new rules and mechanics.

1.1 Overview of the Adventure

The Dragon of Icespire Peak is a beginner-friendly Dungeons & Dragons adventure designed to introduce new players and Dungeon Masters to the game. It is part of the D&D Essentials Kit and serves as a stepping stone for those unfamiliar with the mechanics and storytelling of D&D. The adventure is set in a snowy mountainous region‚ where players must confront the titular dragon and its icy dominion. With a mix of exploration‚ puzzles‚ and combat‚ it provides a balanced experience for 1-5 players. The adventure is structured to be completed in a few sessions‚ making it ideal for new groups. Its accessibility and engaging storyline make it a popular choice for starting a D&D journey.

1.2 Importance of the PDF Version

The PDF version of Dragon of Icespire Peak is a vital resource for both new and experienced players. It provides a digital format that is easily accessible and shareable‚ making it convenient for Dungeon Masters to prepare and run the adventure. The PDF includes all the necessary content from the physical version‚ ensuring that players and DMs have everything they need in one place. Additionally‚ the digital format allows for easy navigation‚ with features like bookmarks and searchable text. Wizards of the Coast has also made an abridged version of the PDF available for free‚ making it an excellent introduction to Dungeons & Dragons for newcomers. This accessibility helps players and DMs alike to dive into the adventure without the need for physical materials‚ enhancing the overall gameplay experience.

1.3 Target Audience for the Adventure

Dragon of Icespire Peak is primarily designed for new players and Dungeon Masters (DMs) looking to dive into Dungeons & Dragons. The adventure is an excellent introduction to the game‚ offering a straightforward storyline and essential rules. It caters to both first-time players and experienced DMs seeking a simple‚ engaging campaign. The PDF version is particularly useful for those who prefer digital tools or want easy access to the adventure. Additionally‚ the sidekick rules included in the PDF make it ideal for small groups or even solo play; This adventure is also a great starting point for players who plan to move on to more complex campaigns like Lost Mine of Phandelver. The free abridged version further makes it accessible to newcomers‚ ensuring everyone can experience the magic of D&D without financial barriers.

Dragon of Icespire Peak PDF Details

The Dragon of Icespire Peak PDF is a 34;3 MB file containing the full adventure‚ including detailed maps‚ encounters‚ and rules. It is compatible with standard PDF viewers.

2.1 Availability of the PDF

The Dragon of Icespire Peak PDF is widely available for download from official sources like Wizards of the Coast and D&D Beyond. It was initially released as part of the Dungeons & Dragons Essentials Kit but has since been offered as a free download. Players and Dungeon Masters can access it directly from the official D&D website or through the D&D Beyond platform. The PDF is also available for purchase as a standalone product‚ though many fans appreciate its availability as a free resource. Additionally‚ some community platforms host the file‚ making it easily accessible to new players. The PDF remains a popular choice for introducing new players to the world of Dungeons & Dragons‚ thanks to its engaging storyline and user-friendly format.

2.2 Content Included in the PDF

The Dragon of Icespire Peak PDF contains a complete adventure module designed for both new players and experienced Dungeon Masters. It includes a detailed storyline set in the Forgotten Realms‚ specifically around the titular Icespire Peak. The PDF features maps‚ NPC descriptions‚ and encounter setups to help DMs guide their players through the adventure. Additionally‚ it introduces innovative sidekick rules‚ allowing for flexible gameplay with 1-5 players. The content is structured to be user-friendly‚ with clear sectioning for ease of navigation. The PDF also provides pre-generated character sheets and optional rules to enhance the gameplay experience. Overall‚ it serves as an excellent introduction to Dungeons & Dragons‚ offering a balanced mix of exploration‚ combat‚ and role-playing opportunities.

2.3 System Requirements for the PDF

To access and utilize the Dragon of Icespire Peak PDF‚ you’ll need a compatible device with a PDF reader installed‚ such as Adobe Acrobat or a similar program. The PDF is optimized for viewing on desktops‚ laptops‚ and tablets‚ ensuring clarity and readability across various screen sizes. No additional software is required to run the adventure itself‚ as it is designed to be used alongside the Dungeons & Dragons 5th Edition ruleset. The file is also compatible with digital platforms like D&D Beyond‚ making it easy to integrate into your virtual campaigns. A stable internet connection is necessary for downloading the PDF‚ but once downloaded‚ it can be accessed offline. The adventure is lightweight‚ requiring minimal storage space‚ and is designed to be user-friendly for both new and experienced players.

Story and Setting of Icespire Peak

Dragon of Icespire Peak unfolds in a frozen mountainous region‚ where players investigate strange occurrences and confront a powerful dragon threatening the land. The adventure blends exploration and combat.

3.1 Adventure Background and Lore

The Dragon of Icespire Peak is set in a remote‚ snow-capped mountain range where the ancient dragon‚ Icespire‚ has awoken‚ causing chaos and destruction. The adventure begins with the party investigating strange events in nearby villages‚ such as missing livestock and eerie lights. As they delve deeper‚ they uncover a web of secrets tied to the dragon’s resurgence and its connection to the mysterious Scrying Stone. The lore weaves together elements of isolation‚ ancient prophecies‚ and the clash between natural and supernatural forces. Players must navigate treacherous landscapes‚ interact with key NPCs‚ and unravel the mystery behind Icespire’s return to restore peace to the region. This backdrop provides a rich tapestry for storytelling and adventure.

3.2 Key Locations in the Adventure

The adventure unfolds across several key locations‚ each serving as a vital backdrop for exploration and conflict. The village of Oakhurst acts as the starting point‚ where players gather information and supplies. From there‚ the journey leads to the frozen wilderness surrounding Icespire Peak‚ a towering mountain with ancient ruins and hidden dangers. The peak itself is the lair of the dragon‚ filled with treacherous terrain and mysterious artifacts. Other notable locations include the Scrying Stone‚ a magical artifact central to the plot‚ and various caves and dungeons that harbor secrets and enemies. These settings provide a diverse range of environments‚ from bustling villages to icy‚ isolated landscapes‚ enriching the storytelling and gameplay experience.

3.3 Main Quests and Objectives

The adventure is structured around a series of interconnected quests that guide players through the story. The primary objective is to investigate strange disturbances in the region and ultimately confront the dragon threatening the land. Players begin by gathering information in the village of Oakhurst‚ where rumors of the dragon’s return surface. A key quest involves retrieving a magical scrying stone‚ essential for understanding the dragon’s motives and location; As the adventure progresses‚ players must navigate treacherous terrain‚ overcome challenges‚ and make decisions that impact the story’s outcome. Side quests and optional objectives allow for deeper exploration of the world and its lore. Each main quest builds momentum‚ leading to the final confrontation with the dragon atop Icespire Peak‚ where the fate of the region is decided.

Gameplay Mechanics and Rules

Dragon of Icespire Peak introduces core D&D mechanics‚ sidekick rules‚ and optimized encounters for 1-5 players‚ ensuring balanced gameplay and engaging storytelling for new and experienced players alike.

Dragon of Icespire Peak introduces foundational Dungeons & Dragons mechanics‚ perfect for new players and DMs. It covers essential rules like ability checks‚ combat basics‚ and exploration. The adventure emphasizes skill checks‚ initiative systems‚ and resource management‚ providing a solid framework for understanding D&D gameplay. Players learn to interact with the environment‚ solve problems‚ and engage in battles‚ while DMs are guided through pacing encounters and narrating scenes. The PDF includes streamlined rules to ease new players into the game‚ ensuring a smooth learning curve. These core mechanics are designed to be intuitive‚ making the adventure accessible while maintaining the depth that D&D is known for. The content is tailored to help both players and DMs build confidence in their abilities as they progress through the story.

4.2 New Rules Introduced in the Adventure

Dragon of Icespire Peak introduces innovative rules to enhance gameplay‚ particularly for new players and DMs. One notable addition is the sidekick system‚ allowing 1-5 players to participate seamlessly. The adventure also includes streamlined mechanics for managing exploration‚ combat‚ and role-playing scenarios. New rules simplify skill checks‚ initiative‚ and resource management‚ making the game more accessible. The PDF incorporates adjusted encounter balancing to cater to varying party sizes‚ ensuring challenges remain engaging without becoming overwhelming. These rules help DMs run the adventure smoothly while keeping players immersed in the story. The introduction of these mechanics ensures a dynamic and enjoyable experience‚ making the adventure a great starting point for those new to Dungeons & Dragons.

4.3 Sidekick Rules for 1-5 Players

The Dragon of Icespire Peak PDF introduces sidekick rules to accommodate parties of 1-5 players‚ ensuring balanced gameplay. These rules provide pre-made sidekick characters with simplified ability sets‚ allowing new players to join easily. Sidekicks can be controlled by the DM or players‚ offering flexibility. The system enables smooth scaling of encounters based on party size‚ maintaining challenge without overwhelming players. This feature is particularly useful for smaller groups or those new to D&D. The sidekick rules promote teamwork and role-playing‚ enhancing the adventure’s accessibility and fun. They seamlessly integrate with the adventure’s core mechanics‚ making it an ideal starter experience for diverse groups.

Running the Adventure

Running the Adventure provides tips for Dungeon Masters‚ pacing guides‚ and strategies for managing player interactions‚ ensuring a smooth and engaging experience for all participants.

5.1 Tips for Dungeon Masters

For running Dragon of Icespire Peak‚ Dungeon Masters should focus on pacing‚ as the adventure is designed for three to five 4-hour sessions. Emphasize storytelling and player agency to enhance immersion. Utilize the provided sidekick rules for smaller parties and adapt encounters based on player choices. Encourage creative problem-solving and ensure balanced combat challenges. Preparing key locations like the peak and surrounding areas beforehand can streamline the session flow. Engage players with descriptive narration and maintain flexibility to accommodate their decisions. These tips ensure a smooth and enjoyable experience for both new and veteran DMs‚ making the adventure memorable for all participants.

5.2 Pacing the Adventure

Pacing is crucial for an engaging experience in Dragon of Icespire Peak. The adventure is designed to span three to five 4-hour sessions‚ depending on player choices and exploration depth. Dungeon Masters should balance combat‚ exploration‚ and role-playing to maintain momentum. Key locations‚ such as the peak and surrounding areas‚ should be prepared in advance to streamline session flow. Encourage players to explore but avoid unnecessary tangents that might slow progress. Use timers or checkpoints to ensure milestones are reached within each session. Flexibility is key; adapt pacing to match player engagement and decisions. This approach ensures the adventure remains dynamic and enjoyable‚ keeping players invested in the story and its outcomes. Proper pacing enhances immersion and satisfaction for all involved.

5.3 Managing Player Interactions

Managing player interactions in Dragon of Icespire Peak requires a balanced approach to ensure everyone stays engaged and the story progresses smoothly. Encourage role-playing and collaboration by setting clear expectations and ground rules. Use non-player characters (NPCs) to guide the narrative and provide opportunities for meaningful interactions. Be prepared to adapt to spontaneous decisions and creative problem-solving‚ which often lead to memorable moments. For larger groups‚ consider assigning speaking order or focusing on one player at a time to prevent chaos. Incorporate side quests or optional objectives to cater to different playstyles. Encourage players to express their characters’ personalities and motivations‚ fostering a dynamic and inclusive environment. By actively listening and responding to their actions‚ you can create a immersive and enjoyable adventure for all participants. This approach ensures that every player feels valued and integral to the story’s success.

Resources and Downloads

Find the Dragon of Icespire Peak PDF on official platforms like Wizards of the Coast and D&D Beyond. Additional resources‚ including community-created content and adventure expansions‚ are also available for download.

6.1 Where to Download the PDF

The Dragon of Icespire Peak PDF is officially available on platforms like D&D Beyond and Wizards of the Coast. It can also be found as part of the Dungeons & Dragons Essentials Kit. Additionally‚ the PDF has been released for free by Wizards of the Coast on select digital platforms‚ making it easily accessible for new players. Fans and community creators often share links to the PDF on forums and social media groups‚ though it’s important to ensure downloads are from trusted sources to avoid unauthorized versions. For the best experience‚ download directly from official sources or verified distributors to support the creators and ensure quality.

6.2 Additional Resources for the Adventure

Beyond the core PDF‚ fans and creators have developed a variety of additional resources to enhance the Dragon of Icespire Peak experience. These include custom maps‚ character sheets‚ and encounter guides‚ often shared on platforms like D&D Beyond and Reddit. Community-created assets‚ such as 3D models for printing or digital tabletop use‚ can add depth to the adventure. Additionally‚ official resources like the Dungeons & Dragons Essentials Kit provide complementary content‚ including pre-made characters and expanded rules. Many Dungeon Masters also share their tips and adaptations on blogs and YouTube‚ offering fresh ideas for running the adventure. These resources help both new and experienced players immerse themselves in the world of Icespire Peak.

6.3 Community-Created Content

The Dragon of Icespire Peak community has produced a wealth of fan-made content to enhance the adventure. Players and DMs alike have created custom maps‚ character builds‚ and alternate storylines‚ often shared on platforms like Reddit and D&D Beyond. Homebrew rules and expansions‚ such as new NPCs or quests‚ are also popular. Additionally‚ artists have created visual aids like battlemaps and character art‚ available on sites like ArtStation and DeviantArt. These resources not only add depth to the adventure but also demonstrate the creativity and passion of the D&D community. They provide fresh perspectives and tools for both new and experienced players to explore the world of Icespire Peak.

Reviews and Reception

Players and DMs praise the Dragon of Icespire Peak PDF for its engaging story‚ balanced combat‚ and sidekick rules. It’s hailed as a great introduction to D&D‚ though some wish it were longer.

7.1 Player and DM Feedback

Players and Dungeon Masters have shared positive feedback about the Dragon of Icespire Peak PDF‚ praising its engaging storyline and balanced combat encounters. Many appreciate its accessibility for new players and the innovative sidekick rules‚ which enhance solo or small-group play. DMs highlight the adventure’s flexibility and ease of customization‚ making it a versatile tool for both beginners and experienced campaigners. However‚ some players note that the adventure feels relatively short and wish for more detailed lore or expanded content. Overall‚ the feedback underscores its value as an excellent introduction to D&D‚ with minor criticisms centered on its brevity and depth.

7.2 Strengths of the Adventure

Dragon of Icespire Peak excels as an introductory adventure‚ offering a smooth onboarding experience for new players and DMs. Its streamlined design ensures a clear narrative flow‚ making it easy to follow and run. The inclusion of pre-made characters and sidekick rules enhances accessibility‚ allowing groups of all sizes to enjoy the story. The PDF’s digital format provides convenience‚ with hyperlinks and a searchable index for quick reference. The adventure’s pacing is well-balanced‚ with a mix of exploration‚ combat‚ and role-playing opportunities that cater to diverse playstyles. Additionally‚ its modular structure allows DMs to easily customize encounters‚ ensuring the adventure remains fresh and engaging for repeat playthroughs. These features solidify its reputation as a standout starter adventure in the D&D ecosystem.

7.3 Areas for Improvement

While Dragon of Icespire Peak is praised for its accessibility‚ some players and DMs have noted areas for refinement. The adventure is relatively short‚ leaving some groups wanting more content or deeper storytelling. Additionally‚ the PDF format‚ while convenient‚ lacks the tactile experience of the printed Essentials Kit‚ which some prefer. New DMs occasionally find the pacing challenging‚ as certain sections can feel rushed or overly simplistic. The final boss encounter‚ while memorable‚ has been criticized by some as feeling anticlimactic compared to the build-up. Lastly‚ the adventure could benefit from more detailed environmental descriptions and NPC backstories to enhance immersion. Despite these minor drawbacks‚ the adventure remains a strong foundation for introducing new players to D&D‚ with its clear structure and engaging gameplay mechanics.

Dragon of Icespire Peak PDF is an excellent introduction for new players and DMs. The free PDF offers a concise‚ engaging adventure‚ perfect for the Essentials Kit. It serves as a solid starting point‚ blending simplicity with fun for D&D newcomers.

8.1 Summary of the Adventure

Dragon of Icespire Peak is an introductory Dungeons & Dragons adventure designed for 1-5 players‚ part of the Essentials Kit. It introduces players to the world of D&D with a straightforward yet engaging storyline. The adventure is set in a cold‚ mountainous region where a dragon has awoken‚ threatening the nearby villages. Players embark on a quest to investigate the dragon’s lair‚ encounter various challenges‚ and ultimately decide the fate of the region. The PDF version provides a concise and organized format‚ making it easy for new Dungeon Masters to navigate. It includes essential rules‚ sidekick mechanics‚ and pre-made characters‚ ensuring a smooth experience for first-time players. The adventure balances simplicity with depth‚ offering a solid foundation for understanding D&D mechanics while delivering an exciting narrative. It serves as an excellent starting point for newcomers and a refreshing experience for seasoned players alike.

8.2 Recommendations for New Players

Dragon of Icespire Peak is an excellent starting point for new players‚ offering a straightforward introduction to Dungeons & Dragons. The adventure’s structure and sidekick rules make it accessible for those unfamiliar with the game. New players should begin by familiarizing themselves with the pre-made characters included in the PDF‚ as they provide a solid foundation for understanding class mechanics. It’s important to take time to learn the core rules gradually‚ as the adventure introduces concepts in a manageable way. Encourage collaboration with the Dungeon Master and fellow players to enhance the storytelling experience. The adventure’s pacing allows for a gentle learning curve‚ making it ideal for first-time adventurers. Embrace creativity and don’t hesitate to ask questions—this adventure is designed to help you grow into the game while enjoying an engaging narrative.

8.3 Future Adventures and Expansions

Dragon of Icespire Peak serves as a gateway to further adventures‚ offering a solid foundation for expanding your Dungeons & Dragons journey. Players can seamlessly transition into more complex campaigns like Lost Mine of Phandelver or explore homebrew content inspired by the adventure’s themes. The sidekick rules introduced in this adventure provide a versatile framework for future expansions‚ allowing Dungeon Masters to create dynamic scenarios for larger or smaller groups. Additionally‚ the modular design of the adventure encourages customization‚ enabling DMs to weave in additional quests or NPCs to enrich the story. With its flexible mechanics and engaging narrative‚ Dragon of Icespire Peak paves the way for countless possibilities‚ ensuring that your adventure continues long after the peak is conquered.

manual de motor detroit serie 60 12.7 litros

The Detroit Diesel Series 60 Engine is a high-performance, heavy-duty diesel engine widely used in trucks and industrial applications. Known for its power and reliability, it offers advanced fuel efficiency and durability. The 12.7-liter model is particularly popular, delivering exceptional performance under demanding conditions. This engine’s design emphasizes longevity and ease of maintenance, making it a preferred choice for fleets and operators. The official service manual provides comprehensive guidance for optimal operation, troubleshooting, and maintenance, ensuring peak performance and compliance with emission standards.

1.1 Overview of the Detroit Diesel Series 60 Engine

The Detroit Diesel Series 60 Engine is a robust, high-performance diesel engine designed for heavy-duty applications. Available in 11.1L, 12.7L, and 14L displacements, it is renowned for its reliability and power. The 12.7L model, in particular, balances fuel efficiency and strength, making it ideal for trucks and industrial machinery. Key features include advanced fuel injection systems, durable construction, and adherence to emission standards. The engine’s modular design simplifies maintenance, while its electronic controls enhance performance monitoring. This engine is a cornerstone in Detroit Diesel’s lineup, trusted for its longevity and versatility in demanding environments.

1.2 Importance of the Service Manual

The service manual for the Detroit Diesel Series 60 Engine is indispensable for optimal performance, safety, and troubleshooting. It provides detailed instructions, diagrams, and specifications for maintenance, repair, and operation. Technicians rely on it to diagnose issues accurately and perform repairs efficiently. The manual ensures compliance with emission standards and prevents costly damage by guiding preventive maintenance. Whether for routine checks or major overhauls, it serves as the primary reference, essential for both experienced mechanics and newcomers to maximize engine longevity and reliability.

Operational Guidelines for the Detroit Series 60 Engine

Operational guidelines ensure safe and efficient engine performance. Procedures include proper starting, monitoring systems, and safe shutdown protocols, all detailed in the service manual for optimal functionality.

2.1 Starting the Engine

Starting the Detroit Diesel Series 60 Engine requires careful preparation. Ensure the parking brake is engaged and all controls are in neutral. Check fuel levels, coolant, and oil before proceeding. Turn the ignition key to the “on” position to power up the electrical system. Allow the glow plugs to pre-heat for the recommended time, typically 10-15 seconds. Turn the key to “start” and monitor the dashboard for warning lights. Once the engine starts, let it idle for a few minutes to warm up. Always refer to the official manual for specific starting procedures under varying conditions.

2.2 Monitoring Engine Performance

Monitoring the Detroit Diesel Series 60 Engine’s performance is crucial for optimal operation. Keep an eye on RPM, oil pressure, coolant temperature, and fuel levels. Ensure all dashboard warning lights are off. Regularly check for unusual noises or vibrations. Maintain proper fluid levels and inspect belts for wear. Address any issues promptly to prevent damage. Use diagnostic tools to track performance metrics and ensure compliance with emission standards. Proper monitoring helps extend engine life and ensures reliable operation under various conditions.

2.3 Shutting Down the Engine

Shutting down the Detroit Diesel Series 60 Engine requires careful steps to ensure safety and prevent damage. Allow the engine to idle for a few minutes to cool down, especially after heavy use. Turn off all accessories and engage the parking brake. Move the transmission to neutral and disable the fuel injection pump. Use the fuel shut-off valve to stop fuel flow. Refer to the official service manual for specific shutdown procedures, as steps may vary by model. Always follow proper shutdown protocols to avoid engine damage and ensure safe operation.

Maintenance and Servicing Schedule

The Detroit Diesel Series 60 12.7L engine requires regular maintenance to ensure optimal performance. Daily checks, scheduled servicing at 250-hour intervals, and major overhauls every 500,000 miles are essential. Compliance with emission standards is maintained through timely filter replacements and system inspections, ensuring reliability and environmental adherence.

3.1 Daily Maintenance Checks

Daily maintenance checks are crucial for ensuring the Detroit Diesel Series 60 Engine operates efficiently. Inspect the oil level, coolant level, and fuel level, ensuring they meet the recommended specifications. Check the air filter for cleanliness and the belts for proper tension and condition. Verify that all hoses and connections are secure and free from leaks. Monitor the battery charge and connections for corrosion. Review the dashboard warning lights and record any unusual readings. These routine checks help prevent unexpected downtime and ensure optimal engine performance, as outlined in the service manual.

3.2 Scheduled Servicing Intervals

The Detroit Diesel Series 60 Engine requires regular servicing at specific intervals to maintain performance and longevity. Oil changes should be performed every 15,000 to 25,000 miles, depending on operating conditions. Fuel filters and air filters should be replaced at 15,000-mile intervals, while the coolant should be changed every 2 years or 30,000 miles. The manual also recommends inspecting and replacing belts, hoses, and other wear components at 50,000-mile intervals. Adhering to these schedules ensures optimal engine efficiency, reduces downtime, and complies with emission standards, as detailed in the official service manual.

3.3 Overhaul and Major Repair Procedures

The Detroit Diesel Series 60 Engine requires periodic overhauls to restore performance and longevity. Major repairs involve disassembling the engine, inspecting components, and replacing worn parts. The official manual recommends overhauling the engine every 500,000 miles or as specified. Key steps include replacing piston rings, bearings, and seals to ensure proper compression and reduce oil consumption. Genuine Detroit Diesel parts are essential for reliability. Adhering to torque specifications and following manual guidelines ensures a successful overhaul, maintaining engine efficiency and compliance with emission standards.

Diagnostic and Troubleshooting Techniques

Identify common issues like low power or excessive smoke using DDEC fault codes. Utilize diagnostic tools for emission system checks and engine performance monitoring. Troubleshoot fuel system malfunctions and EGR-related problems promptly to ensure compliance and optimal performance.

4.1 Identifying Common Issues

Common issues with the Detroit Diesel Series 60 12.7L engine include problems with the EGR system, DPF clogging, and cooling system leaks. The EGR system can malfunction due to soot buildup, requiring periodic cleaning. DPF issues often arise from improper regeneration, leading to reduced performance. Cooling system leaks may cause overheating, which can damage engine components. Additionally, low compression in cylinders and faulty fuel injectors are frequent concerns. Regular maintenance, as outlined in the service manual, helps identify and address these issues early, preventing costly repairs and ensuring optimal engine performance.

4.2 Using Diagnostic Tools and Software

Diagnostics for the Detroit Diesel Series 60 12.7L engine rely on advanced tools and software. The DDEC system provides real-time data and fault codes, enabling precise troubleshooting. Tools like Detroit Diesel’s proprietary diagnostic software allow technicians to identify issues such as EGR system malfunctions or fuel injector problems. Additionally, handheld scanners and fault code readers help pinpoint electrical and mechanical faults. Regular use of these tools ensures early detection of potential issues, minimizing downtime and repair costs. Always refer to the official service manual for detailed diagnostic procedures.

4.3 Troubleshooting Engine Performance Problems

Troubleshooting the Detroit Diesel Series 60 12.7L engine involves identifying issues like low power, excessive emissions, or rough operation. Common problems include faulty EGR valves, clogged fuel injectors, or DDEC system errors. Technicians use diagnostic tools to analyze fault codes and monitor engine parameters. For example, low fuel pressure may indicate a faulty lift pump, while elevated coolant temperatures could signal a malfunctioning cooling system. Addressing these issues promptly ensures optimal performance and prevents costly damage. Always refer to the official service manual for detailed troubleshooting procedures and solutions.

Technical Specifications of the Detroit Series 60 Engine

The Detroit Diesel Series 60 engine is available in 11.1L, 12.7L, and 14L displacements, offering horsepower ranges from 350 to 500 HP and up to 1,850 lb-ft torque. Designed for heavy-duty applications, it meets stringent emission standards, ensuring environmental compliance while delivering exceptional power and efficiency.

5.1 Engine Dimensions and Weight

The Detroit Diesel Series 60 Engine, specifically the 12.7-liter model, is designed for optimal performance while maintaining manageable dimensions. Its compact design ensures compatibility with various applications. The engine’s approximate dimensions are 1,524 mm in length, 1,016 mm in width, and 1,220 mm in height. Weighing around 1,450 kg, it balances power with portability. These specifications make it ideal for heavy-duty trucks and industrial machinery, ensuring ease of integration without compromising on power output or efficiency. The engine’s durability and weight distribution contribute to its reliability in demanding environments.

5.2 Performance Ratings and Capabilities

The Detroit Diesel Series 60 Engine, particularly the 12.7-liter model, delivers exceptional performance with horsepower ratings ranging from 350 to 500 HP. Designed for heavy-duty applications, it produces up to 1,650 lb-ft of torque, ensuring robust power delivery. The engine excels in fuel efficiency, optimizing performance while minimizing consumption. Its advanced design meets stringent emission standards, making it environmentally compliant. With a proven track record in demanding environments, the Series 60 engine is a reliable choice for long-haul trucking, construction, and industrial use, offering unmatched durability and consistent performance.

5.3 Emission Standards and Compliance

The Detroit Diesel Series 60 Engine is designed to meet stringent emission standards, ensuring environmental compliance. Equipped with advanced emission control technologies, it adheres to EPA regulations and reduces harmful emissions. The engine features systems like the Exhaust Gas Recirculation (EGR) and Selective Catalytic Reduction (SCR) to minimize nitrogen oxides and particulate matter. These technologies ensure the engine operates cleanly while maintaining high performance. Compliance with emission standards is achieved without compromising power or fuel efficiency, making the Series 60 a reliable choice for eco-friendly and regulated applications.

Fuel and Cooling Systems

The Detroit Diesel Series 60 Engine features advanced fuel injection systems for optimal performance and efficiency. The cooling system ensures proper temperature regulation, preventing overheating and extending engine life.

6.1 Fuel System Components and Functionality

The Detroit Diesel Series 60 12.7L engine features a robust fuel system designed for optimal performance and efficiency. Key components include fuel injectors, fuel pumps, and fuel filters. The fuel injectors deliver precise fuel amounts, ensuring efficient combustion. The fuel pumps maintain consistent pressure, while filters prevent contaminants from entering the system. The DDEC electronic control system monitors and adjusts fuel delivery for optimal engine performance. Proper maintenance of these components is crucial for maintaining fuel efficiency and reducing emissions, as outlined in the official service manual.

6.2 Cooling System Maintenance and Repair

The cooling system of the Detroit Diesel Series 60 12.7L engine is critical for maintaining optimal operating temperatures. Regular maintenance includes inspecting hoses, belts, and the radiator for leaks or damage. The coolant level and condition should be checked, with the recommended 50/50 glycol-water mixture used to prevent corrosion and freezing. Annual draining and flushing of the system are essential, followed by refilling with the specified coolant. Repairing leaks promptly and ensuring proper fan operation helps prevent overheating, which can lead to costly damage. Adhering to the service manual ensures longevity and efficiency.

6.3 Optimizing Fuel Efficiency

Optimizing fuel efficiency for the Detroit Diesel Series 60 12.7L engine involves regular maintenance and smart driving practices. Ensure proper tire pressure, as under-inflated tires increase fuel consumption. Maintain the engine in top condition by following the service manual’s tuning and filter replacement schedules. Avoid aggressive driving and keep a consistent speed, as this reduces fuel waste. Monitor load management to avoid excessive weight that lowers efficiency. Use the recommended fuel type and consider upgrading to fuel-efficient components. Regularly reviewing fuel consumption data and adjusting habits can significantly improve overall efficiency and reduce operating costs while lowering emissions.

Emission Control Systems

The Detroit Diesel Series 60 12.7L engine features advanced emission control systems to reduce environmental impact. These systems ensure compliance with strict emission standards while maintaining performance and efficiency. Proper maintenance of these systems is critical for optimal operation and minimizing emissions. Regular servicing, as outlined in the manual, helps sustain their effectiveness and ensures the engine operates within regulatory requirements. This contributes to a cleaner environment and reduces operational costs over time. Modern technologies integrated into the engine support eco-friendly performance without compromising power delivery. Regular inspections and updates are essential to maintain peak functionality and adherence to environmental regulations. By following the manual’s guidelines, operators can ensure the emission control systems function at their best, balancing efficiency and sustainability. Monitoring and addressing any issues promptly prevents potential failures and maintains compliance with emission standards. Overall, these systems are vital for both performance and environmental responsibility. Consistent upkeep ensures the engine remains efficient, reliable, and eco-conscious, aligning with current and future emission regulations. Operators are encouraged to prioritize these systems to uphold the engine’s reputation for durability and environmental stewardship. The manual provides detailed instructions to help maintain and troubleshoot these systems effectively, ensuring they continue to perform as intended. This proactive approach not only benefits the environment but also enhances the engine’s overall longevity and cost-effectiveness. Properly functioning emission control systems are a cornerstone of the Detroit Diesel Series 60 engine’s design, reflecting its commitment to innovation and sustainability. By adhering to the manual’s recommendations, operators can maximize the engine’s potential while minimizing its ecological footprint. This comprehensive approach ensures the engine remains a leader in both power and environmental performance. Regular maintenance and adherence to guidelines are key to sustaining these systems’ effectiveness and overall engine health. The Detroit Diesel Series 60 12.7L engine exemplifies a balance between power and environmental responsibility through its advanced emission control technologies. Operators are urged to stay informed and follow best practices to uphold this balance. The engine’s design and the manual’s instructions work together to support eco-friendly operation without sacrificing performance. This integration of technology and guidance ensures the engine meets both operational and environmental demands. By prioritizing emission control system maintenance, operators contribute to a more sustainable future while enjoying the engine’s renowned reliability and efficiency. The Detroit Diesel Series 60 engine stands as a testament to innovation, offering a powerful yet environmentally conscious solution for modern applications. Its emission control systems are a critical component of this legacy, and proper care ensures they continue to deliver as intended. Operators who invest time in maintaining these systems reap the benefits of a high-performing, eco-friendly engine. The manual serves as a valuable resource, providing clear instructions to support these efforts. Together, the engine’s design and the manual’s guidance empower operators to achieve optimal results. The Detroit Diesel Series 60 engine remains a top choice for those seeking a balance of power, efficiency, and environmental responsibility. Its emission control systems are central to this appeal, and their proper maintenance ensures lasting performance; Operators are encouraged to embrace these systems as a key aspect of the engine’s overall excellence. By doing so, they not only preserve the engine’s capabilities but also support broader environmental goals. The Detroit Diesel Series 60 12.7L engine is a prime example of how advanced technology can harmonize with eco-conscious design. Its emission control systems are a testament to this philosophy, offering a powerful yet sustainable solution. Operators who prioritize these systems’ maintenance uphold the engine’s legacy of excellence and environmental stewardship. The manual provides the necessary tools and knowledge to achieve this, ensuring the engine continues to lead in its class. Properly maintained emission control systems are essential for maximizing the engine’s potential and minimizing its environmental impact. Operators are advised to remain vigilant and proactive in their maintenance routines, following the manual’s expert guidance. This commitment not only enhances engine performance but also supports a cleaner, healthier environment. The Detroit Diesel Series 60 engine is engineered to deliver exceptional power while meeting stringent emission standards, making it a responsible choice for modern applications. Its emission control systems are a vital part of this engineering marvel, and their care is essential for sustained performance. Operators who adhere to the manual’s recommendations can trust in the engine’s ability to balance power and efficiency with environmental responsibility. The Detroit Diesel Series 60 12.7L engine is a shining example of innovation and sustainability, thanks in large part to its advanced emission control systems. Properly maintained, these systems ensure the engine operates at peak performance while minimizing its ecological footprint. Operators are encouraged to view these systems as a priority, leveraging the manual’s comprehensive guidance to uphold their effectiveness. This dedication not only preserves the engine’s capabilities but also aligns with global efforts to reduce emissions and promote sustainability. The Detroit Diesel Series 60 engine is a leader in its class, and its emission control systems play a pivotal role in this leadership. Operators who maintain these systems according to the manual’s instructions can expect optimal performance, efficiency, and environmental compliance. This commitment to excellence ensures the engine remains a trusted choice for years to come. The integration of advanced emission control technologies in the Detroit Diesel Series 60 engine underscores its reputation as a powerful yet eco-conscious powerplant. Operators who prioritize the maintenance of these systems, as outlined in the manual, contribute to the engine’s enduring success and environmental stewardship. By staying informed and proactive, operators can maximize the engine’s potential while supporting a sustainable future. The Detroit Diesel Series 60 12.7L engine exemplifies the perfect blend of power, efficiency, and environmental responsibility, with its emission control systems at the heart of this blend. Properly maintained, these systems ensure the engine operates at its best, delivering exceptional performance while minimizing emissions. Operators who follow the manual’s guidance can trust in the engine’s ability to meet both operational and environmental demands. This commitment to excellence ensures the Detroit Diesel Series 60 engine remains a top choice for those seeking a balance of power and sustainability. The engine’s emission control systems are a key factor in this appeal, and their proper maintenance is essential for sustained performance. Operators are encouraged to embrace these systems as a critical component of the engine’s overall excellence. By doing so, they not only preserve the engine’s capabilities but also support broader environmental goals. The Detroit Diesel Series 60 engine is a testament to innovative engineering, offering a powerful yet environmentally friendly solution for modern applications. Its emission control systems are central to this legacy, and their proper maintenance ensures lasting performance. Operators who prioritize these systems’ upkeep, as per the manual’s instructions, uphold the engine’s reputation for excellence and sustainability. The manual serves as a vital resource, providing the knowledge needed to maintain these systems effectively. Together, the engine’s design and the manual’s guidance empower operators to achieve optimal results. The Detroit Diesel Series 60 12.7L engine remains a preferred choice for those seeking a balance of power, efficiency, and environmental responsibility. Its emission control systems are integral to this appeal, and their proper maintenance is crucial for sustained performance. Operators who adhere to the manual’s recommendations can trust in the engine’s ability to deliver exceptional results while minimizing its ecological impact. This commitment to maintenance ensures the engine continues to lead in its class, offering a powerful yet sustainable solution for various applications. The Detroit Diesel Series 60 engine is engineered to excel in both performance and environmental stewardship, with its emission control systems playing a vital role. Operators who follow the manual’s guidance can maximize the engine’s potential, ensuring it operates efficiently while meeting emission standards. This proactive approach not only enhances engine longevity but also supports a cleaner environment. The Detroit Diesel Series 60 12.7L engine stands as a prime example of how advanced technology can harmonize with eco-conscious design. Its emission control systems are a testament to this philosophy, offering a powerful yet sustainable solution. Operators who prioritize these systems’ maintenance uphold the engine’s legacy of excellence and environmental responsibility. The manual provides the necessary tools and knowledge to achieve this, ensuring the engine continues to lead in its class. Properly maintained emission control systems are essential for maximizing the engine’s potential and minimizing its environmental impact. Operators are advised to remain vigilant and proactive in their maintenance routines, following the manual’s expert guidance. This commitment not only enhances engine performance but also supports a cleaner, healthier environment. The Detroit Diesel Series 60 engine is designed to deliver exceptional power while meeting stringent emission standards, making it a responsible choice for modern applications. Its emission control systems are a vital part of this engineering marvel, and their care is essential for sustained performance. Operators who adhere to the manual’s recommendations can trust in the engine’s ability to balance power and efficiency with environmental responsibility. The Detroit Diesel Series 60 12.7L engine is a shining example of innovation and sustainability, thanks in large part to its advanced emission control systems. Properly maintained, these systems ensure the engine operates at peak performance while minimizing its ecological footprint. Operators are encouraged

7.1 Exhaust Gas Recirculation (EGR) System

The Detroit Diesel Series 60 12.7L engine incorporates an advanced Exhaust Gas Recirculation (EGR) system to reduce nitrogen oxide (NOx) emissions. The EGR system reroutes a portion of exhaust gases back into the engine’s combustion chamber, lowering combustion temperatures and reducing emissions. Proper maintenance of the EGR system, including cleaning the EGR valve and cooler, is essential to prevent clogging and ensure optimal performance. The manual provides detailed instructions for inspecting and servicing these components to maintain emission compliance and engine efficiency. Regular upkeep helps prevent issues like reduced power and increased emissions, ensuring the system functions effectively. By adhering to the manual’s guidelines, operators can maintain the EGR system’s reliability and contribute to environmental sustainability. Additionally, the EGR system works in tandem with other emission control technologies to meet stringent regulatory standards. Properly maintained, it plays a critical role in minimizing the engine’s environmental impact while preserving its performance capabilities.

7.2 Selective Catalytic Reduction (SCR) Technology

Selective Catalytic Reduction (SCR) technology is a key emission control system in the Detroit Diesel Series 60 12.7L engine. It reduces nitrogen oxide (NOx) emissions by injecting a urea-based diesel exhaust fluid (DEF) into the exhaust stream. The DEF reacts with exhaust gases in the SCR catalyst, converting NOx into nitrogen and water. This system works in conjunction with the EGR system to meet stringent emission standards. Regular maintenance, such as DEF level checks and catalyst inspections, is essential for optimal performance. The manual provides detailed instructions for SCR system upkeep to ensure compliance with environmental regulations and maintain engine efficiency. Proper SCR operation is critical for minimizing emissions while maximizing engine performance. Operators must adhere to the manual’s guidelines to avoid system malfunctions and ensure long-term reliability. SCR technology plays a vital role in reducing the engine’s environmental impact without compromising power output.

7.3 Emission Standards Compliance

The Detroit Diesel Series 60 12.7L engine is designed to meet stringent EPA emission standards, ensuring reduced environmental impact. By utilizing advanced emission control technologies, including Exhaust Gas Recirculation (EGR) and Selective Catalytic Reduction (SCR), the engine effectively minimizes nitrogen oxides (NOx) and particulate matter emissions. Compliance with these standards is achieved through meticulous engineering and adherence to regulatory requirements. Regular maintenance, as outlined in the service manual, is essential to sustain emission performance and ensure ongoing compliance with environmental regulations.

Detroit Diesel Electronic Control System (DDEC)

The Detroit Diesel Electronic Control System (DDEC) is an advanced engine management system designed to optimize performance, efficiency, and emissions control. It monitors and controls critical engine functions, ensuring precise fuel injection, torque management, and diagnostics. The DDEC system enhances overall engine reliability and operational efficiency, making it a cornerstone of the Series 60 engine’s advanced technology.

8.1 Overview of the DDEC System

The Detroit Diesel Electronic Control (DDEC) system is a sophisticated electronic engine management platform designed to optimize performance, fuel efficiency, and emissions control. It utilizes advanced sensors and software to monitor and regulate engine functions, such as fuel injection timing, exhaust gas recirculation, and turbocharger performance. The DDEC system enhances engine operation by providing real-time diagnostics, fault logging, and adaptive learning capabilities. It plays a critical role in ensuring compliance with emission standards while maintaining peak engine efficiency and reliability. The system is integral to the Series 60 engine’s modernization and operational excellence.

8.2 Calibration and Updates

The DDEC system requires periodic calibration and software updates to ensure optimal engine performance and compliance with emission standards. Calibration involves configuring engine parameters such as fuel injection timing and torque settings, tailored to specific operational demands. Updates are performed using specialized tools and software, ensuring the system remains current with the latest advancements. Proper calibration and updates enhance fuel efficiency, reduce emissions, and maintain engine reliability. Always refer to the official service manual for detailed procedures and guidelines to perform these tasks accurately and safely.

8.3 Diagnostics and Fault Codes

The DDEC system provides advanced diagnostic capabilities to monitor and troubleshoot engine performance issues. Fault codes are stored in the system, allowing technicians to quickly identify problems such as sensor malfunctions or emission control issues. Specialized diagnostic tools and software, like those referenced in the Detroit Diesel Series 60 service manual, enable detailed analysis of engine data and real-time monitoring. Regular diagnostic checks ensure early detection of potential issues, minimizing downtime and maintaining optimal engine efficiency. Referencing the official manual is essential for accurate interpretation and resolution of fault codes.

Safety Precautions and Best Practices

Always follow safety guidelines in the official Detroit Diesel Series 60 manual. Wear personal protective equipment and ensure proper ventilation when working with engines. Handle hot or heavy components with care, and be prepared for emergencies by having fire extinguishers nearby. Regular training and adherence to best practices minimize risks and ensure safe engine operation and maintenance.

9.1 Safety Guidelines for Engine Operation

Ensure all safety precautions are followed when operating the Detroit Diesel Series 60 Engine. Always wear personal protective equipment (PPE), including goggles, gloves, and steel-toe boots. Conduct a thorough pre-operation inspection to identify potential hazards. Properly secure loose clothing and avoid jewelry that may catch on moving parts. Follow the official Detroit Diesel service manual for startup and shutdown procedures. Keep the work area well-ventilated to avoid inhaling harmful fumes. Never operate the engine near open flames or sparks. Stay alert and avoid distractions while the engine is running. Familiarize yourself with emergency shutdown procedures and ensure fire extinguishers are nearby.

9.2 Personal Protective Equipment (PPE)

Wearing proper Personal Protective Equipment (PPE) is crucial when working with the Detroit Diesel Series 60 Engine. Essential items include safety glasses, gloves, and steel-toe boots to protect against chemical spills, sharp objects, and heavy tools. A face mask is recommended when handling dusty or hazardous materials. Ensure all PPE meets industry safety standards. Properly fitted gear reduces the risk of injury during maintenance or operation. Always consult the official Detroit Diesel service manual for specific PPE recommendations tailored to your engine model. Adhering to these guidelines ensures a safer working environment and prevents potential accidents.

Resources and References

9.3 Emergency Procedures

In case of an emergency involving the Detroit Diesel Series 60 Engine, prioritize safety and quick action. If the engine catches fire, use a fire extinguisher rated for diesel fires. Immediately shut off the engine and fuel supply if a leak occurs. Coolant or fuel spills require containment to prevent environmental damage. Always have emergency contact numbers handy. Refer to the official service manual for detailed procedures on handling crises. Regular training and familiarity with emergency protocols can prevent accidents and ensure effective response. Keep emergency kits accessible at all times. Stay calm and follow established guidelines to minimize risks.

ge monogram oven cleaning instructions

Cleaning your GE Monogram Oven is essential for maintaining its performance and appearance․ Regular cleaning prevents grease buildup and ensures optimal cooking results․ This guide provides comprehensive instructions for effective cleaning, covering manual methods, self-cleaning features, and maintenance tips to keep your oven in prime condition․

1․1 Importance of Regular Cleaning

Regular cleaning of your GE Monogram Oven is crucial for maintaining its efficiency, safety, and longevity․ Grease and food residue can build up over time, leading to unpleasant odors, reduced performance, and even fire hazards․ A clean oven ensures consistent cooking results and prevents the spread of bacteria․ Additionally, regular maintenance enhances the oven’s appearance and prevents stubborn stains from forming․ Cleaning also helps maintain the oven’s warranty by adhering to manufacturer recommendations․

1․2 Overview of Cleaning Methods

Cleaning your GE Monogram Oven can be done through various methods to suit your needs․ The self-cleaning feature uses high heat to burn food residue, while steam cleaning offers a gentler approach․ Manual cleaning involves using oven cleaners or homemade solutions like baking soda and vinegar․ Regular wiping of spills and using the steam clean function can prevent heavy buildup․ Each method has its benefits, and choosing the right one ensures a clean, efficient, and safe oven․ Always follow manufacturer guidelines for best results․

Safety Precautions

Safety is crucial when cleaning your GE Monogram Oven․ Always turn off power, avoid hot surfaces, keep children and pets away, and ensure proper ventilation during cleaning․

2․1 Essential Safety Tips

When cleaning your GE Monogram Oven, prioritize safety to avoid accidents․ Always turn off the oven and let it cool completely before cleaning․ Keep children and pets away during the process․ Never touch hot surfaces, and ensure the area around the oven is clear of flammable materials․ Proper ventilation is crucial, especially during self-cleaning cycles, as fumes can be hazardous․ Avoid using abrasive cleaners or harsh chemicals that might damage surfaces or release harmful vapors․ Always follow manufacturer guidelines for a safe and effective cleaning experience․

2․2 Handling Hot Surfaces

When working with your GE Monogram Oven, always exercise caution with hot surfaces․ Use oven mitts or towels to protect your hands from burns․ Never touch the oven’s interior, racks, or exterior during or immediately after cooking or cleaning, as they can remain extremely hot․ Keep children and pets away from the oven when it is in use or cooling down․ Always allow the oven to cool completely before cleaning to ensure a safe and injury-free experience․

2․3 Ventilation Requirements

Proper ventilation is crucial when cleaning your GE Monogram Oven, especially during self-cleaning cycles․ Open windows or use an exhaust fan to remove fumes and odors․ The self-clean cycle releases carbon monoxide from insulation, so ensure good airflow to minimize exposure․ Avoid using strong chemicals, as they can release harmful vapors․ Keep the area well-ventilated to maintain a safe environment and prevent respiratory irritation․ This step ensures a safe and effective cleaning process for both you and your oven․

Preparation for Cleaning

Before cleaning your GE Monogram Oven, ensure it is cool, unplug it, and remove racks․ Clear the surrounding area to prevent fire hazards and accidental start-ups․

3․1 Turning Off the Oven

To ensure safety, turn off your GE Monogram Oven at the controls and confirm it is cool before cleaning․ Unplug the oven or switch off the circuit breaker for added safety․ Allow the oven to cool completely, as high temperatures can cause burns or damage․ Never start cleaning until the oven is at room temperature․ This step prevents accidents and ensures a safe cleaning process․ Always verify the oven’s temperature before proceeding with any cleaning tasks․

3․2 Removing Oven Racks

Before cleaning, remove the oven racks to ensure thorough access to the interior․ Use oven mitts or gloves to protect your hands from sharp edges․ Place racks in a soak solution or dishwasher for easy cleaning․ Avoid using abrasive cleaners or scrubbers, as they may damage the racks’ finish․ For tough food residue, let racks soak in warm water and mild detergent․ Always refer to your GE Monogram Oven manual for specific rack removal and cleaning instructions to maintain their quality and durability․

3․3 Clearing the Surrounding Area

Ensure the area around your GE Monogram Oven is clear of flammable materials and obstacles․ Move any nearby items, such as curtains or towels, to prevent fire hazards․ Cover countertops and floors with newspaper or a drop cloth to protect them from cleaning solutions․ Open windows for ventilation and avoid leaving children or pets nearby․ This preparation ensures a safe and efficient cleaning process, allowing you to focus on the oven without distractions or risks․

Manual Cleaning Methods

Manual cleaning involves removing racks and wiping the interior with a damp cloth or gentle cleaner․ Apply cleaning solutions to tough stains and let them soak before scrubbing․ Avoid harsh chemicals and abrasive tools to prevent damage․ Regular manual cleaning keeps your GE Monogram Oven in great condition and maintains its performance and appearance over time․

4․1 Interior Cleaning Solutions

For manual interior cleaning, mix baking soda and water to create a paste, applying it to tough stains․ Let it soak overnight before scrubbing gently with a soft cloth․ Avoid harsh chemicals, as they can damage the finish․ Instead, use a mild cleaning solution or white vinegar diluted with water․ Always rinse thoroughly and dry the interior to prevent water spots․ Regular cleaning maintains the oven’s appearance and ensures optimal performance․ Follow manufacturer recommendations for safe and effective results․

4․2 Exterior Cleaning Techniques

Clean the exterior of your GE Monogram Oven using a soft, damp cloth and a gentle cleaning solution to avoid scratching the surface․ For tougher stains, mix equal parts water and white vinegar on a microfiber cloth․ Gently wipe the exterior, paying attention to knobs and handles․ Avoid harsh chemicals or abrasive materials, as they can damage the finish․ For stainless steel surfaces, use a stainless steel cleaner and polish for a sleek appearance․ Regular exterior cleaning maintains the oven’s aesthetic appeal and prevents grime buildup․

4․3 Cleaning Oven Racks

Clean GE Monogram Oven Racks by removing them and washing with mild soap and warm water․ For tough stains, soak racks in soapy water or a vinegar solution․ Scrub gently with a non-abrasive sponge to avoid scratching․ For convenience, place racks in the dishwasher on a gentle cycle․ Dry thoroughly before reinstalling to prevent water spots․ Regular cleaning ensures racks remain in good condition and maintain optimal oven performance․ Avoid using harsh chemicals or abrasive cleaners to preserve the racks’ finish․

4․4 Door Gasket Maintenance

Regularly inspect and maintain the oven door gasket to ensure a proper seal, which is crucial for efficient cooking and safety․ Avoid cleaning the gasket, as this can damage the material․ Never use harsh chemicals or abrasive cleaners, as they may degrade the gasket․ Instead, wipe gently with a soft, dry cloth to remove surface dust․ If the gasket shows signs of wear or damage, replace it immediately to prevent heat from escaping and potential fire hazards․ A well-maintained gasket ensures optimal oven performance and longevity․

Using the Self-Cleaning Feature

The self-cleaning feature simplifies oven maintenance by locking in food residue and burning it to ash․ Always remove racks and wipe up excess spills before starting․ Ensure the oven is cool, then set the self-clean cycle․ Keep the area clear, and avoid opening the door during cleaning․ Ventilate the kitchen to prevent fumes․ This feature is efficient but requires careful preparation and safety precautions to ensure a safe and effective cleaning process․

5․1 Understanding the Self-Clean Cycle

The self-clean cycle uses high heat to reduce food residue to ash, making cleaning easier․ It is a hands-off process, but preparation is key․ Remove racks, wipe excess spills, and ensure the oven is cool before starting․ The cycle duration varies, typically 2-5 hours․ The oven door locks during cleaning for safety․ Ventilate your kitchen to manage fumes․ After the cycle, let the oven cool, then wipe away ash with a damp cloth․ This method is efficient but requires careful preparation and patience for optimal results․

5․2 Preparing for the Self-Clean Cycle

Before using the self-clean feature, ensure the oven is cool and empty․ Remove racks, shelves, and any utensils․ Wipe up large food debris with a damp cloth to prevent smoke․ Keep children and pets away․ Turn off the oven and allow it to cool completely․ Clear the surrounding area to avoid fire hazards․ Proper preparation ensures a safe and effective cleaning cycle, minimizing fumes and residue․

5․3 Activating the Self-Cleaning Mode

To activate the self-cleaning mode, press the SELF CLEAN button on the control panel․ Select the desired cleaning time using the number pads, typically 2-4 hours, depending on soil level․ Close the oven door firmly and press START․ The oven will automatically lock and begin the cycle․ Ensure the area is well-ventilated to prevent fumes․ Do not open the door during the cycle․ After completion, let the oven cool before wiping away ash with a damp cloth․ This process ensures a thorough cleaning without harsh chemicals․

5․4 Post-Cycle Cleaning Steps

After the self-cleaning cycle, allow the oven to cool completely before cleaning․ Wear gloves to protect your hands from sharp edges․ Wipe the interior with a damp cloth to remove ash and residue․ Avoid cleaning the door gasket, as it’s essential for sealing․ For tough spots, use a soft scrubber and mild soap․ Clean the racks separately with soap and warm water․ Finally, polish the exterior with an appliance cleaner to restore its shine․ Regular post-cycle maintenance ensures your oven remains efficient and looks like new․

Steam Cleaning Method

The steam cleaning method is a gentle, eco-friendly option for GE Monogram ovens․ Add water, run the steam cycle, and wipe away food residue․ Effective for light spills and grime, but may not tackle tough stains like burnt-on food․ Ideal for routine maintenance․

6․1 Benefits of Steam Cleaning

Steam cleaning is a gentle yet effective method for maintaining your GE Monogram Oven․ It uses water vapor to loosen food residue without harsh chemicals, making it eco-friendly and safer for surfaces․ This technique is ideal for light spills and grime, leaving the oven interior clean and fresh․ Steam cleaning is also energy-efficient and reduces strong odors․ However, it may not tackle tough, burnt-on stains, making it best for routine maintenance rather than deep cleaning tasks․ Regular steam cleaning helps preserve the oven’s finish and performance․

6․2 Steps to Use Steam Clean

To use the steam clean feature on your GE Monogram Oven, start by ensuring the oven is cool․ Add 1 cup of water to the oven floor or a steam clean pan․ Close the oven door and select the Steam Clean option from the control panel․ Set the timer according to the manufacturer’s instructions, typically 30 minutes․ Allow the cycle to run, as steam loosens food residue․ Once complete, wipe the interior with a damp cloth to remove grime․ This method is gentle and effective for light cleaning, avoiding harsh chemicals and maintaining your oven’s finish․

6․3 Natural Cleaning Solutions

For a chemical-free approach, use natural solutions to clean your GE Monogram Oven․ Mix equal parts water and white vinegar in a spray bottle․ Apply the solution to the interior surfaces and let it sit for 30 minutes to loosen grime․ For tougher stains, create a paste with baking soda and water, applying it directly to affected areas․ Allow it to sit overnight, then wipe clean with a damp cloth․ Lemon juice can also be used to remove stubborn stains naturally․ Always ensure the oven is cool before cleaning and avoid harsh chemicals to maintain the finish․

Cleaning Oven Doors and Windows

Regularly clean the oven doors and windows to maintain visibility and hygiene․ Use a gentle cleaner and a soft cloth to wipe away grime․ Avoid harsh chemicals to protect the surface finish and ensure a sparkling appearance․

7․1 Exterior Door Cleaning

Cleaning the exterior of your GE Monogram oven door is essential for maintaining its sleek appearance and hygiene․ Use a soft, damp cloth and a gentle cleaning solution to wipe away fingerprints, splatters, and grime․ Avoid harsh chemicals or abrasive cleaners, as they can damage the finish․ For tougher stains, mix a small amount of dish soap with warm water and apply gently․ Rinse thoroughly with a clean, damp cloth and dry with a towel to prevent streaks․ Regular cleaning prevents grime buildup and keeps the exterior looking pristine and polished․

7․2 Interior Window Cleaning

Cleaning the interior window of your GE Monogram oven ensures clear visibility during cooking․ Use a gentle glass cleaner or a mixture of equal parts water and white vinegar․ Apply the solution with a soft, lint-free cloth, avoiding abrasive materials that could scratch the glass․ Wipe in a circular motion, then dry thoroughly with a clean cloth to prevent streaks․ Avoid using harsh chemicals or high-pressure washes, as they may damage the glass or its protective coatings․ Regular cleaning maintains clarity and enhances the overall appearance of your oven․

7․3 Preventing Streaks and Residue

To prevent streaks and residue on your GE Monogram oven windows, use a microfiber cloth to wipe down surfaces after cleaning․ Avoid using paper towels, as they can leave lint․ For glass surfaces, apply a small amount of glass cleaner or a water-and-white-vinegar solution, then buff dry with a clean microfiber cloth․ Regularly cleaning and drying the windows prevents water spots and residue buildup, ensuring clear visibility․ Avoid using abrasive cleaners or scrubbers, as they may scratch the glass or leave streaks․

Deep Cleaning the Oven

Deep cleaning your GE Monogram oven is essential for removing stubborn grime and food residue․ Use a combination of gentle scrubbing and specialized cleaning solutions to restore its shine and efficiency․ Regular deep cleaning ensures optimal performance and prevents heavy buildup over time, keeping your oven in excellent condition for years to come․

8․1 When to Deep Clean

Deep cleaning your GE Monogram oven is necessary every 3 to 6 months or when visible grime and food residue accumulate․ If you notice heavy staining, persistent odors, or reduced performance, it’s time for a thorough cleaning․ Additionally, consider deep cleaning after major cooking projects or when preparing for special occasions to ensure your oven operates efficiently and maintains its appearance․

8․2 Effective Deep Cleaning Techniques

For deep cleaning, combine baking soda and water to create a paste, applying it to interior surfaces․ Let it sit overnight before wiping clean with a damp cloth․ Steam cleaning is also effective—place a bowl of water in the oven and heat it to create steam, loosening grime․ Avoid harsh chemicals to prevent damage․ Scrub tough stains gently with a non-abrasive sponge․ After cleaning, dry surfaces thoroughly to prevent water spots and maintain your oven’s polished finish․

8․3 Removing Tough Stains

For stubborn stains, apply a paste made from baking soda and water directly to the affected areas․ Let it sit overnight, then wipe clean with a damp cloth․ For particularly tough spots, use the oven’s self-cleaning feature to reduce stains to ash, which can be easily wiped away․ Avoid harsh chemicals or abrasive cleaners, as they may damage surfaces․ For natural cleaning, vinegar can be used to soak stains before gentle scrubbing with a non-abrasive sponge․ Always dry surfaces thoroughly after cleaning to prevent streaks․

Post-Cleaning Care Tips

After cleaning, polish the exterior with a microfiber cloth and gentle appliance polish․ Avoid harsh chemicals and dry surfaces thoroughly to prevent streaks․ Wipe racks and check for residue regularly to maintain your oven’s pristine condition․

9․1 Polishing the Exterior

Polishing the exterior of your GE Monogram Oven enhances its appearance and protects the surface․ Use a soft, microfiber cloth and a gentle appliance polish to buff away fingerprints and smudges․ Avoid abrasive cleaners or scrubbers, as they may damage the finish․ Apply the polish evenly, working in circular motions․ Buff thoroughly to achieve a streak-free shine․ Regular polishing helps maintain the oven’s sleek look and prevents grime buildup․ For tougher spots, dampen the cloth slightly but avoid excessive moisture, which could harm electrical components․ This step ensures your oven remains both functional and visually appealing․

9․2 Avoiding Harsh Chemicals

Avoid using harsh chemicals when cleaning your GE Monogram Oven to prevent damage to the finish or internal components․ Abrasive cleaners, bleach, or ammonia can strip away protective coatings or discolor surfaces․ Instead, opt for gentle cleaning solutions like vinegar and water or mild detergents․ Always test a small area first to ensure the cleaner won’t harm the material․ For tougher stains, use a soft cloth and a non-abrasive scrubber to avoid scratching the surface․ This approach ensures your oven remains in excellent condition while maintaining safety and longevity․

9․3 Regular Maintenance Schedule

Establishing a regular cleaning schedule ensures your GE Monogram Oven remains efficient and looks its best․ Clean the exterior daily with a soft cloth to remove fingerprints and splatters․ Wipe the interior weekly, focusing on visible spills․ Run the self-clean cycle monthly to tackle tough buildup․ For deeper maintenance, clean the racks and check the door gasket every few months․ Always vent the area during self-cleaning to minimize odors and fumes․ Regular upkeep prevents grime accumulation and extends the oven’s lifespan․

Troubleshooting Common Issues

Addressing common issues like lingering odors or stubborn stains can be resolved with natural solutions like vinegar or baking soda․ Ensure proper ventilation and follow cleaning guidelines to maintain your oven’s performance and longevity․

10․1 Dealing with Odors

Odors in your GE Monogram Oven can be tackled effectively using natural solutions․ Mix water and white vinegar in a heat-safe bowl, place it inside, and heat at 350°F for 30 minutes․ This method neutralizes lingering smells․ For tougher odors, sprinkle baking soda on the oven floor and wipe clean after cooling․ Always ventilate the area thoroughly during and after cleaning to prevent fumes․ Regularly cleaning spills and avoiding harsh chemicals will help maintain a fresh, odor-free oven environment for optimal performance and safety․

10․2 Managing Stubborn Stains

For stubborn stains in your GE Monogram Oven, apply a baking soda and water paste directly to the affected areas․ Let it sit overnight, then wipe clean with a damp cloth․ For tough grease, use a gentle scrubber and a mixture of equal parts water and white vinegar․ Avoid harsh chemicals, as they can damage the oven’s finish․ Regularly addressing spills prevents stains from hardening, ensuring your oven remains in excellent condition for years to come․

Additional Tips and Best Practices

Preventative cleaning and eco-friendly solutions ensure your GE Monogram Oven stays pristine․ Use soft cloths and natural cleaners to avoid harsh chemicals․ Regular maintenance prevents grime buildup, extending longevity․

11․1 Preventative Measures

Preventative maintenance is key to keeping your GE Monogram Oven clean and functional․ Regularly wipe down surfaces after use to prevent grime buildup․ Use a gentle cleaner or steam to tackle spills immediately, avoiding harsh chemicals that can damage finishes․ Covering the oven floor with a liner or foil can catch debris and simplify cleaning․ Scheduling monthly deep cleans ensures your oven remains in top condition, preventing tough stains and odors from forming․ Consistency in these practices extends the oven’s lifespan and maintains its efficiency․

11․2 Using the Right Cleaning Tools

Using the right cleaning tools ensures effective and safe maintenance of your GE Monogram Oven․ Soft, lint-free cloths or sponges are ideal for wiping surfaces without scratching․ Gentle cleaning solutions, like baking soda and water or white vinegar, are recommended for manual cleaning․ For tougher stains, a soft-bristle brush or non-abrasive scrubber can be used․ Always avoid harsh chemicals, abrasive sponges, or metal scourers, as they may damage the oven’s finish․ Steam cleaning is also an excellent option for a chemical-free clean, leaving your oven pristine and hygienic․

11․3 Eco-Friendly Cleaning Options

Eco-friendly cleaning options are ideal for maintaining your GE Monogram Oven while reducing environmental impact․ Use a paste made from baking soda and water to tackle tough stains without harsh chemicals․ White vinegar dissolved in water is another effective, non-toxic solution for wiping down surfaces․ For a chemical-free deep clean, utilize the steam cleaning feature, which uses water vapor to loosen grime naturally․ These methods ensure a clean oven while promoting sustainability and avoiding harmful substances․

Warranty and Service Information

Your GE Monogram Oven is backed by a comprehensive warranty․ Regular cleaning and maintenance are essential to uphold warranty terms․ For service, contact GE’s dedicated support team or refer to your manual for specific instructions and warranty details․

12․1 Understanding Your Warranty

Your GE Monogram Oven warranty covers parts and labor for one year from purchase․ Proper maintenance, including regular cleaning, is required to maintain warranty validity․ Refer to your user manual for specific terms and conditions․ Contact GE customer support for any warranty-related inquiries or service needs․ Ensure all cleaning and maintenance activities align with manufacturer guidelines to avoid voiding the warranty․ Understanding your warranty ensures protection and longevity for your appliance․

12․2 When to Contact a Technician

Contact a qualified technician if your GE Monogram Oven experiences malfunctions, such as a faulty self-clean cycle or persistent odors․ If stubborn stains or damage occur despite proper cleaning, professional assistance is recommended․ Additionally, if the door gasket is damaged or the oven’s performance declines, seek expert help․ Avoid using harsh chemicals that could void the warranty․ Always follow manufacturer guidelines to ensure your oven operates safely and efficiently, and consult a technician for issues beyond routine cleaning and maintenance․

Regular cleaning and proper maintenance ensure your GE Monogram Oven performs optimally and lasts longer․ Follow these tips to keep it in excellent condition for years to come․

13․1 Key Takeaways

Regular cleaning is essential for maintaining your GE Monogram Oven’s performance and longevity․ Always prioritize safety, especially when using the self-clean feature․ Manual cleaning with gentle solutions and steam cleaning are effective methods․ Avoid harsh chemicals to protect the oven’s surfaces․ Clean racks separately and maintain the door gasket for a proper seal․ Schedule routine maintenance to prevent grease buildup and ensure optimal cooking results․ By following these tips, you can keep your oven in excellent condition for years to come․

13․2 Final Tips for Oven Longevity

Proper care ensures your GE Monogram Oven lasts for years․ Regularly wipe down surfaces after use to prevent grease buildup․ Use gentle cleaners to avoid damaging finishes․ Avoid extreme temperatures and ensure proper ventilation during operation․ Inspect and replace worn-out parts like door gaskets promptly․ Schedule professional maintenance if issues arise․ By following these practices, you’ll enjoy consistent performance and extend your oven’s lifespan․

PDF

somewhere over the rainbow ukulele chords pdf

Discover the timeless appeal of “Somewhere Over the Rainbow” on ukulele, a song perfect for showcasing its warm, resonant tones. With a PDF guide, learn to play this beloved tune, creating a beautiful and emotional connection with every strum.

Overview of the Song

“Somewhere Over the Rainbow” is a timeless classic written by E.Y. Harburg and Harold Arlen for the 1939 film The Wizard of Oz. Its hauntingly beautiful melody and poignant lyrics have made it a global favorite, transcending generations. The song’s structure, with its iconic verse and chorus, lends itself perfectly to the ukulele’s warm, resonant tones. Originally written in the key of A-flat, it has been adapted into various keys to suit different instruments and vocal ranges. The ukulele version, often played in C Major, captures the song’s emotional depth while maintaining its accessibility. This beloved tune continues to inspire musicians worldwide, offering a perfect blend of simplicity and artistry. Its versatility and enduring appeal make it a must-learn for any ukulele enthusiast.

Importance of Chord Charts and Tabs

Chord charts and tabs are essential tools for learning “Somewhere Over the Rainbow” on the ukulele. They provide a clear, visual guide to chord shapes, finger placement, and progression, making the learning process straightforward. Tabs, or tablature, detail exactly where to press the strings, while chord charts offer a quick reference for chord changes. These resources are particularly helpful for beginners, as they break down complex sequences into manageable parts. By following chord charts and tabs, players can master the song’s iconic progression, ensuring smooth transitions and accurate playing. They also serve as a foundation for understanding the song’s structure, allowing musicians to focus on technique and expression. These tools are invaluable for both practice and performance, making them a must-have for any ukulele enthusiast.

Why This Song is Perfect for Ukulele

“Somewhere Over the Rainbow” is an ideal choice for the ukulele due to its gentle, flowing melody and simple chord progression. The song’s iconic tune, originally from The Wizard of Oz, translates beautifully to the ukulele’s soft, resonant tones. Its moderate tempo allows players to focus on clean chord changes and smooth strumming, making it accessible for both beginners and experienced musicians. Additionally, the song’s emotional depth and universal appeal make it a crowd-pleaser. The ukulele’s portability and ease of play further enhance its suitability, enabling players to perform this timeless classic anywhere. Its versatility in arrangements also means it can be played in various styles, from simple to elaborate, making it a delightful addition to any ukulele repertoire.

Understanding the Ukulele Chords

Mastering ukulele chords is essential for a smooth performance of “Somewhere Over the Rainbow.” Each chord has a unique finger placement and structure, building the foundation for clear, resonant playing. Focus on proper fingering and string alignment to ensure clean tones. Practice chord transitions to maintain rhythm and flow. Understanding these basics will help you play the song confidently and beautifully, bringing its iconic melody to life on your ukulele.

C Major Chord

The C Major chord is a fundamental chord in ukulele playing, often used in popular songs like “Somewhere Over the Rainbow.” To play a C Major, place your ring finger on the third fret of the second string (A string) and your middle finger on the second fret of the third string (G string). The first and fourth strings are played open; Ensure your fingers are positioned close to the fret to produce a clear sound. Avoid muting adjacent strings by keeping your fingers arched. This chord is crucial for the song’s bright and cheerful feel, so practice changing smoothly to other chords like G and Am to maintain the melody’s flow.

Finger Placement and Strumming Tips

Proper finger placement is essential for clear, resonant chords. Place your fingers directly behind the fret, close to the fretboard, to avoid muting adjacent strings. Keep your fingers arched to prevent touching other strings unintentionally. For strumming, use a down-up pattern with your index finger or a ukulele pick for a brighter sound. Start with a slow tempo and gradually increase speed as you gain confidence. Focus on maintaining a steady rhythm, emphasizing the downbeats for a lively feel. Dynamics can enhance your performance—strum softer for verses and slightly louder for choruses. Experiment with palm muting to add percussive effects. Practice these techniques consistently to develop muscle memory and achieve a smooth, polished sound. Refer to the PDF guide for visual finger placement reference.

G Major Chord

The G Major chord is a foundational chord in ukulele playing and is widely used in “Somewhere Over the Rainbow.” To play a G Major chord, place your middle finger on the second fret of the third string and your ring finger on the third fret of the fourth string. Leave the first and second strings open. This chord produces a bright, warm sound that complements the song’s nostalgic melody. Ensure your fingers are positioned directly behind the fret to avoid muting the strings. A common mistake is placing fingers too far from the fret, which can cause muffled tones. Practice changing to G Major smoothly from other chords like C or Am to maintain the song’s flow. Refer to your PDF guide for a clear visual reference of the chord shape.

Smooth Transitions from C to G

Mastering smooth transitions between C and G chords is essential for a seamless performance of “Somewhere Over the Rainbow.” To transition from C to G, lift your ring finger from the third fret of the fourth string while keeping your middle finger on the second fret of the third string. This allows for a quick shift to the G chord shape. Practice this movement slowly, focusing on finger placement accuracy. A common challenge is rushing the transition, which can cause chord interruptions. Use a metronome to improve timing and ensure smooth shifts. Additionally, minimize finger movement by keeping your fingers close to the fretboard. Regular practice will help you achieve a polished, professional sound. Refer to your PDF guide for chord diagrams to visualize the transition path.

A Minor (Am) Chord

The A minor (Am) chord is a fundamental part of “Somewhere Over the Rainbow” and adds emotional depth to the song. To play an Am chord on the ukulele, place your index finger on the first fret of the second string and your middle finger on the second fret of the fourth string. This creates the classic Am shape. Make sure to press the strings firmly to avoid muffled sounds. A common mistake is placing fingers too far from the fret, which can cause tuning issues. Practice switching to Am from other chords like C or G to build muscle memory. Use the PDF guide to visualize the chord shape and ensure proper finger placement. Regular practice will make playing Am smooth and intuitive, enhancing your overall performance of the song.

Common Mistakes and Corrections

When learning “Somewhere Over the Rainbow,” common mistakes include rushing the tempo and inconsistent strumming. Many players also struggle with smooth chord transitions, especially between C and G. To correct this, practice changing chords slowly and focus on maintaining a steady rhythm. Another mistake is muffled strings caused by improper finger placement. Ensure your fingers are close to the fret and avoid pressing too hard, which can bend the strings out of tune. Additionally, some players neglect the down-up strumming pattern, which gives the song its signature feel. To improve, practice with a metronome and pay attention to dynamics. Finally, avoid skipping practice—consistency is key to mastering this beautiful tune.

F Major Chord

The F Major chord is a crucial part of “Somewhere Over the Rainbow” and can be challenging for beginners due to its barre chord structure. To play it correctly, place your index finger across all four strings at the first fret, ensuring even pressure. A common mistake is not pressing firmly enough, resulting in muted or muffled sounds. To achieve a clean sound, keep your finger close to the fret and avoid angled placement. Practice switching to F from other chords like C and G to build smooth transitions. This chord adds depth to the song’s melody, so take time to perfect it. With consistent practice, you’ll master the F Major chord and enjoy its rich, full sound in your ukulele playing.

Barre Chords Made Easy

Barre chords can seem intimidating, but with the right approach, they become manageable. Start by placing your index finger flat across the neck, pressing all strings firmly at the desired fret. A common challenge is achieving clear notes; ensure your finger is positioned close to the fret. For the F Major barre chord in “Somewhere Over the Rainbow,” focus on pressing strings 1 through 4 at the first fret. Practice changing from C to F smoothly by sliding your hand up the neck. To build strength, try simple barre exercises like holding the chord for 10 seconds or switching between open chords and barre chords. With patience and consistent practice, barre chords will become second nature, enhancing your ukulele playing and adding depth to your favorite songs like “Somewhere Over the Rainbow.”

How to Play “Somewhere Over the Rainbow”

Mastering “Somewhere Over the Rainbow” involves a smooth blend of chords and strumming. Begin with the verse using C and G chords, transitioning to Am and F for the chorus. Focus on a steady down-up strumming pattern to create the song’s iconic feel. Emphasize clear finger placement and smooth chord changes to maintain the melody’s emotional depth. Practice the progression slowly, gradually increasing speed as confidence grows. This timeless tune shines on ukulele, making it a joy to play and share with others.

Chord Progression Breakdown

The chord progression for “Somewhere Over the Rainbow” is simple yet iconic, making it accessible for all skill levels. The song primarily uses four chords: C, G, Am, and F. The verse follows a repeating pattern of C ⸺ G ⸺ Am ⸺ F, creating a melancholic yet hopeful tone. The chorus mirrors this structure, with slight variations to emphasize emotional peaks. To add depth, incorporate a brief intro using C and G, transitioning smoothly into the verse. For the bridge, repeat the verse chords to maintain continuity. Practice this progression slowly, focusing on seamless chord changes. Over time, increase your speed to achieve a flowing, natural rhythm. This progression is a cornerstone of the song’s enduring beauty and is easily adaptable to various playing styles.

Verse and Chorus Structure

“Somewhere Over the Rainbow” follows a classic verse-chorus structure, with a memorable and emotive flow. The verses establish the song’s narrative, while the chorus delivers its iconic, uplifting melody. Each verse consists of two lines played over a C-G-Am-F progression, setting a reflective tone. The chorus, also using the same chords, rises with a hopeful crescendo. The song’s repetition makes it easy to learn and play, as the same chord sequence is used throughout. Focus on maintaining a steady rhythm and smooth transitions between sections. The verse and chorus structure supports the song’s emotional journey, from introspection to aspiration. Practice this arrangement to master the song’s flow and enjoy its timeless beauty on your ukulele.

Strumming Patterns for the Right Feel

To capture the essence of “Somewhere Over the Rainbow,” use a gentle, flowing strumming pattern that complements its melancholic yet hopeful melody. Start with a basic down-up strumming pattern, focusing on smooth transitions between chords. For a more dynamic feel, incorporate a mix of downstrokes and fingerpicking on the higher strings to emphasize the song’s emotional peaks. Experiment with adding slight syncopation or pauses to match the lyrical phrasing. A common pattern is down, down, up, down, up, down, up, repeated for each chord. Adjust the intensity for verses and choruses, keeping verses softer and choruses more pronounced. This approach will help you achieve the song’s iconic, dreamy quality while maintaining a natural, heartfelt rhythm on your ukulele.

Down-Up Strumming Technique

The down-up strumming technique is essential for achieving the smooth, flowing rhythm of “Somewhere Over the Rainbow.” Start with a basic pattern of down, up, down, up, focusing on a steady, relaxed motion. For this song, emphasize the downstrokes on beats 1 and 3, and the upstrokes on beats 2 and 4. To enhance the melody, try combining this with fingerpicking on the higher strings during the chorus. Practice muting the lower strings slightly during upstrokes to avoid muddying the sound. This technique creates a light, airy feel that complements the song’s iconic melody. Experiment with slight variations to match the emotional phrasing of the lyrics, ensuring a natural, heartfelt performance on your ukulele.

Putting It All Together

Once you’ve mastered the chords, strumming patterns, and techniques, it’s time to combine them into a cohesive performance. Start by playing the verse with a steady rhythm, focusing on smooth chord transitions. As you move into the chorus, emphasize the down-up strumming to highlight the melody. Pay attention to dynamics, playing softly during verses and swelling during the chorus for emotional impact. Practice the bridge separately before integrating it into the full song, ensuring seamless transitions. Slow down initially to build confidence, then gradually increase your tempo. With consistent practice, the pieces will fall into place, creating a beautiful, heartfelt rendition of “Somewhere Over the Rainbow” that resonates with listeners.

Practice Routine for Mastery

Start with a 10-minute warm-up of basic chords and strumming. Dedicate 10 minutes to chord practice, focusing on smooth transitions between C, G, Am, and F. Spend 10 minutes on strumming patterns, emphasizing the down-up technique. Practice the full song slowly, gradually increasing speed. Incorporate dynamics by playing softly in verses and stronger in choruses. Allocate time to work on problem areas and record yourself for improvement. End with a 5-minute cool-down, reviewing what was learned. Consistency is key, so practice daily, even for short periods, to build muscle memory and mastery. Stay patient and enjoy the journey of perfecting “Somewhere Over the Rainbow.”

Tips for Smooth Playing

Finger placement accuracy and smooth chord transitions are key. Practice controlled strumming and maintain rhythm. Stay relaxed to avoid fatigue and ensure a polished performance.

Chord Changes: Making Them Seamless

Smooth chord changes are essential for a polished performance of “Somewhere Over the Rainbow.” Focus on transitioning between chords like C, G, Am, and F with minimal finger movement. Practice changing chords slowly at first, ensuring each note rings clearly. Use a metronome to improve timing and consistency. Pay attention to finger placement and avoid unnecessary finger lifts. Transitioning from C to G, for example, requires shifting the second finger from the third fret to the third fret on a different string. Regular practice will build muscle memory, making chord changes feel natural and effortless over time.

Using a Metronome for Timing

A metronome is a powerful tool for improving timing when playing “Somewhere Over the Rainbow” on ukulele. It helps maintain a steady rhythm, essential for the song’s flowing melody. Start by setting the metronome to a slow tempo (around 60-80 BPM) and focus on strumming downbeats in sync with the clicks. Gradually increase the speed as you gain confidence. Pay attention to how chord changes align with the beats, ensuring smooth transitions. Use the metronome during practice sessions to develop a strong sense of rhythm and timing. Over time, this will enhance your overall performance, making the song sound more polished and professional. Consistent practice with a metronome will also boost your musical accuracy and enjoyment of playing.

String Muting and Dynamics

Mastering string muting and dynamics will elevate your rendition of “Somewhere Over the Rainbow” on ukulele, adding depth and emotion to your playing. String muting involves lightly touching the strings with your palm or fingers to reduce resonance, preventing unwanted notes between chords. This technique is especially useful during chord transitions to maintain a clean sound. Dynamics refer to playing with varying degrees of loudness and softness. Start softly in the verses and gradually build intensity in the chorus to create a captivating contrast. Experiment with gentle downstrokes for softer moments and stronger strums for crescendos. By controlling dynamics and muting effectively, you can convey the song’s emotional journey, making your performance more engaging and expressive. Practice these techniques to refine your interpretation and connect deeply with the music.

Playing with Emotion

Playing “Somewhere Over the Rainbow” with emotion is key to capturing its magical essence. Connect deeply with the lyrics and melody, allowing your feelings to guide your strumming and chord transitions. Vary your tempo slightly to emphasize heartfelt moments, and consider adding subtle pauses for dramatic effect. Dynamics play a crucial role—soften your touch during quieter passages and let your strums swell during crescendos. Experiment with vibrato or bending notes to add a vocal-like quality to your playing. Remember, the ukulele’s gentle tone is perfect for conveying vulnerability and hope. Listen to iconic versions for inspiration, then make the song your own by expressing your unique emotional interpretation. This will make your performance unforgettable and deeply resonant.

Additional Resources

Enhance your ukulele journey with PDF guides, video tutorials, practice apps, and online communities. These resources offer chord tabs, tutorials, and support to help you master “Somewhere Over the Rainbow.”

PDF Guides and Tabs

Download high-quality PDF guides and tabs for “Somewhere Over the Rainbow” to master the ukulele chords and melody. These resources provide clear chord charts, finger placements, and lyrics, ensuring accuracy. Whether you’re a beginner or intermediate player, PDF guides offer a structured approach to learning. They often include chord progressions, strumming patterns, and tips for smooth transitions. Many PDFs are free or affordable, making them accessible to all. Find versions tailored to your skill level, with detailed instructions to enhance your playing. Practice with confidence using these reliable guides, designed to help you perfect the song’s iconic melody and harmony. Download yours today and start playing like a pro!

Video Tutorials for Visual Learners

For those who learn best by watching, video tutorials are an excellent resource to master “Somewhere Over the Rainbow” on ukulele. Platforms like YouTube offer a wealth of lessons tailored to all skill levels, from beginners to advanced players. These tutorials often break down the song into sections, demonstrating chord changes, finger placement, and strumming techniques in real time. Many videos include slow-motion replays, split-screen views, and on-screen chord diagrams, making complex parts easier to follow. Additionally, instructors provide tips on dynamics, timing, and expression, helping you capture the song’s emotional essence. Whether you’re struggling with a specific chord or refining your overall performance, video tutorials offer a dynamic and engaging way to learn. Find one that matches your pace and style to enhance your practice sessions and improve faster. These visual guides are perfect for reinforcing the techniques outlined in PDF guides, ensuring a well-rounded learning experience.

Apps for Ukulele Practice

Enhance your ukulele practice with apps designed to make learning fun and efficient. Apps like Fender Play, Yousician, and Ukulele Buddy offer interactive lessons, chord libraries, and progress tracking. These tools provide real-time feedback, helping you improve timing and technique. Many apps include exercises and songs, such as “Somewhere Over the Rainbow,” with adjustable tempos and looping features for focused practice. They also often include tuners, metronomes, and chord charts, making them comprehensive companions for your musical journey. For those who prefer digital learning, these apps complement PDF guides by adding an engaging, interactive dimension to your practice routine. They’re perfect for staying motivated and mastering the song at your own pace. Explore these apps to elevate your ukulele skills and enjoy a more dynamic learning experience.

Online Communities for Support

Joining online communities is a great way to connect with fellow ukulele enthusiasts and gain support during your learning journey. Platforms like Facebook groups, Reddit forums, and specialized ukulele websites offer spaces to share tips, ask questions, and showcase your progress. Many communities are dedicated to specific songs, including “Somewhere Over the Rainbow,” where you can find chord advice and inspiration. These groups often share resources like PDF guides, video tutorials, and practice tips. Engaging with others who are learning the same song can help you stay motivated and inspired. Additionally, online communities provide a space to celebrate milestones and learn from others’ experiences, making the process of mastering the ukulele more enjoyable and collaborative. They’re invaluable for fostering growth and connection as you play your favorite tunes.

Mastering “Somewhere Over the Rainbow” on ukulele is a rewarding journey that celebrates music’s beauty. Embrace the joy of playing and continue exploring the endless possibilities of this charming instrument.

Final Thoughts on Mastering the Song

Mastery of “Somewhere Over the Rainbow” on ukulele is a testament to dedication and passion. With consistent practice and a focus on emotion, you’ll bring this iconic melody to life beautifully. Embrace the journey, celebrate small victories, and let your love for music shine through every chord. The ukulele’s gentle tones align perfectly with the song’s heartfelt message, making it a rewarding piece to master. Remember, the true magic lies in the connection you create with the music and your audience. Keep strumming, and let your ukulele be the voice of your musical soul.

Encouragement to Keep Practicing

Keep practicing, and remember, every strum brings you closer to mastering “Somewhere Over the Rainbow.” Celebrate small victories, like nailing a tricky chord or smoother transitions. Embrace challenges as opportunities to grow and enjoy the journey of learning. Stay patient and kind to yourself—progress takes time, but persistence pays off. The more you play, the more this iconic melody will come to life through your ukulele. Let your passion for music guide you, and don’t hesitate to embrace the process. With dedication, you’ll soon play this beloved song with confidence and grace, sharing its timeless beauty with others.

Exploring More Ukulele Songs

Mastering “Somewhere Over the Rainbow” is just the beginning of your ukulele journey. With the skills you’ve gained, explore more songs to expand your repertoire. The ukulele’s versatility allows you to play a wide range of genres, from classic Hawaiian tunes to modern pop hits. Consider delving into timeless favorites like “I’m Yours” by Jason Mraz or “Ho Hey” by The Lumineers. For a nostalgic touch, try traditional folk songs or even jazz standards. Remember, each new song you learn strengthens your technique and broadens your musical horizons. Use the same PDF guides and chord charts to discover more melodies and continue growing as a musician. The world of ukulele music is vast and rewarding—keep strumming and enjoying the process!

herblore guide

Herblore is the traditional study of herbs for wellness, medicine, and spiritual growth․ It connects nature with human health, offering natural remedies and holistic approaches to well-being․

1․1 What is Herblore?

Herblore is the ancient practice of studying and utilizing herbs for medicinal, culinary, and spiritual purposes․ It involves the cultivation, preparation, and application of plants to promote health and well-being․ Rooted in traditional knowledge, herblore emphasizes the natural properties of plants to address various physical and emotional needs․ From teas and tinctures to salves and infusions, herblore offers a holistic approach to wellness․ It also explores the symbolic and spiritual significance of plants, making it a versatile and deeply connected practice․ By understanding the unique qualities of each herb, individuals can harness their potential for healing and self-care․

Herblore is not just about remedies; it’s about building a relationship with nature and embracing its wisdom for a balanced life․

1․2 Importance of Herblore in Modern Times

Herblore holds significant relevance in today’s fast-paced, health-conscious world․ With increasing interest in natural remedies, herblore offers alternatives to synthetic medicines, promoting holistic well-being․ Its emphasis on plant-based solutions aligns with modern sustainability efforts and the desire for eco-friendly practices․ Additionally, herblore addresses mental health by providing calming and uplifting herbs like chamomile and lavender, which are invaluable in stressful times․ By fostering a connection to nature, herblore encourages self-care and mindfulness, making it a valuable practice for modern lifestyles․ Its versatility in culinary, medicinal, and spiritual applications ensures its enduring appeal, helping individuals maintain balance in an ever-changing world․

Embracing herblore today means embracing a healthier, more sustainable way of living․

History of Herblore

Herblore’s history began with ancient civilizations like Egypt and China, using herbs for healing and rituals․ It evolved by merging traditional practices with scientific knowledge․

2․1 Ancient Civilizations and Their Use of Herbs

The earliest evidence of herb use dates back to ancient Mesopotamia around 4000 BC, with clay tablets documenting medicinal plants․ Ancient Egypt, China, and Greece also embraced herblore, using plants for healing, rituals, and spiritual practices․ Egyptian papyri, like the Ebers Papyrus, detailed herbal remedies for ailments, while Chinese herbalism was systematized in texts like the Shennong Ben Cao Jing․ In Greece, Hippocrates, the father of medicine, relied on herbs to create remedies․ Other cultures, such as Ayurvedic practitioners in India and Native American tribes, also utilized herbs for both practical and spiritual purposes․ These ancient practices laid the groundwork for modern herblore, emphasizing harmony between nature and human health․

2․2 Evolution of Herblore Through the Ages

Herblore has evolved significantly over centuries, adapting to scientific discoveries and cultural influences․ Building on ancient practices, the Middle Ages saw monasteries preserving herbal knowledge through meticulously illustrated manuscripts․ The Renaissance period brought exploration, introducing new herbs from distant lands, while the invention of printing spread herbal remedies widely․ By the 18th and 19th centuries, the rise of scientific methods led to the isolation of active compounds, bridging traditional herblore with modern medicine․ In the 20th century, industrialization and pharmaceutical advancements shifted focus, but a resurgence of interest in natural health revived herblore․ Today, it blends traditional wisdom with contemporary research, emphasizing sustainability and holistic well-being․ This evolution highlights herblore’s enduring relevance in an ever-changing world․

Benefits of Herblore

Herblore offers natural remedies, promoting holistic health and sustainability through traditional herbal practices and modern applications, providing effective and accessible solutions for overall well-being and harmony with nature․

3․1 Physical Health Benefits

Herblore provides numerous physical health benefits, from boosting immunity to alleviating chronic conditions․ Herbs like echinacea strengthen the immune system, while turmeric and ginger reduce inflammation․ Many herbs, such as peppermint and chamomile, aid digestion and relieve digestive disorders․ Others, like calendula and aloe vera, promote skin health and accelerate wound healing․ Herbal remedies can also support cardiovascular health, with hawthorn and garlic helping to lower blood pressure and improve circulation․ Additionally, herbs such as ginkgo biloba enhance blood flow to the brain, improving cognitive function․ By harnessing the natural properties of plants, herblore offers effective, non-invasive solutions for maintaining and improving physical health, making it a valuable complement to modern medicine․

3․2 Mental and Emotional Well-being

Herblore plays a vital role in supporting mental and emotional well-being by providing natural remedies for stress, anxiety, and mood balance․ Herbs like lavender and chamomile are renowned for their calming properties, promoting relaxation and reducing anxiety․ Adaptogenic herbs such as ashwagandha and rhodiola help the body adapt to stress, fostering emotional resilience․ Additionally, herbs like St․ John’s Wort and lemon balm are traditionally used to uplift mood and alleviate mild depression․ These natural solutions can create a sense of balance and harmony, enhancing overall mental health without the side effects often associated with synthetic treatments․ By incorporating herbal remedies into daily routines, individuals can nurture their emotional well-being in a holistic and sustainable way․

Common Herbs Used in Herblore

Herblore utilizes a wide variety of plants, each with unique properties for health, wellness, and spiritual practices, offering diverse applications in remedies, rituals, and daily life․

4․1 Chamomile: The Calming Herb

Chamomile, a gentle and versatile herb, is renowned for its soothing properties․ It is commonly used in teas, tinctures, and salves to promote relaxation and reduce stress․ Known for its calming effects on the mind and body, chamomile helps alleviate anxiety, insomnia, and restlessness․ Its anti-inflammatory and antiseptic qualities make it ideal for skin care, treating wounds, and soothing digestive issues․ Chamomile is also used in rituals for emotional balance and peace․ While generally safe, it may cause allergies in some individuals, especially those sensitive to daisies․ Proper dosage and consultation with a healthcare professional are recommended before use․

4․2 Lavender: The Soothing Herb

Lavender, with its calming scent and versatile uses, is a cornerstone in herblore․ Known for its soothing effects, it is widely used in essential oils, teas, and sachets to promote relaxation․ Lavender helps ease stress, anxiety, and insomnia, while its antiseptic properties make it effective for skin issues like burns and acne․ It is also used in rituals for peace and clarity․ Lavender can be added to bathwater for a calming soak or used in potpourri for a serene atmosphere․ While generally safe, lavender oil should be diluted before skin application․ Allergic reactions are rare but possible․ Consulting a healthcare professional before use is advisable, especially for those with sensitive skin or allergies․

4․3 Sage: The Brain-Boosting Herb

Sage, a timeless herb, is renowned for its cognitive-enhancing properties and is often called the “brain-boosting herb․” Ancient Greeks and Romans valued it for improving memory and mental clarity․ Sage contains compounds like cineole, which support brain function and may help combat cognitive decline․ It is commonly consumed as tea, added to meals, or taken as a tincture․ Sage also aids digestion and has antimicrobial properties, making it versatile in both culinary and medicinal uses․ For optimal benefits, it’s best to use fresh leaves or high-quality extracts․ Overconsumption should be avoided, as it may cause side effects․ Sage is a powerful tool for enhancing mental acuity and overall well-being, making it a staple in herblore practices․

4․4 Echinacea: The Immunity Builder

Echinacea, also known as coneflower, is a powerful herb celebrated for its immune-boosting properties․ Native to North America, it has been used by indigenous tribes for centuries to combat infections and support overall health․ Echinacea contains active compounds like flavonoids and alkylamides, which stimulate the immune system and reduce inflammation; It is commonly used to prevent and treat colds, flu, and other respiratory infections․ Echinacea can be consumed as a tea, supplement, or tincture․ Regular use may enhance immune function and shorten illness duration․ However, it’s best to consult a healthcare provider before long-term use, especially for those with autoimmune conditions․ Echinacea is a natural and effective way to fortify the body’s defenses, making it a cornerstone in herblore for immune health․

Advanced Herblore Practices

Advanced herblore explores specialized techniques, blending magical and culinary practices to enhance wellness and spirituality, requiring a deeper understanding and expertise in herbcraft․

5․1 Magical Herbalism: Using Herbs for Spiritual Purposes

Magical herbalism is the practice of using herbs for spiritual and metaphysical purposes, connecting nature’s energy with human intent․ Herbs like sage, lavender, and chamomile are often used in rituals, spells, and meditations to promote balance, protection, and healing․ This practice emphasizes the holistic properties of plants, blending their physical and spiritual benefits․ Many traditions believe that herbs can amplify intentions, cleanse spaces, and enhance divine connection․ Whether through burning, infusions, or sacred bundles, magical herbalism offers a profound way to harness the power of plants for personal growth and spiritual harmony․ It encourages a deeper appreciation for nature’s wisdom and its role in spiritual well-being․

5․2 Culinary Herblore: Enhancing Flavors in Cooking

Culinary herblore is the art of using herbs to elevate and enhance the flavors in cooking․ By understanding the unique profiles of herbs like basil, rosemary, thyme, and parsley, chefs and home cooks can transform simple dishes into gourmet delights․ Herbs add freshness, depth, and complexity to meals, whether used as garnishes, marinades, or infusions․ From aromatic spices like cinnamon and nutmeg to fragrant leaves like bay and lemongrass, culinary herblore encourages creativity and experimentation in the kitchen․ Pairing herbs with complementary ingredients can create harmonious flavor balances, while bold combinations can introduce exciting twists․ This practice not only enhances taste but also highlights the versatility of herbs in global cuisines, making it a cornerstone of culinary exploration and innovation․

Safety and Precautions in Herblore

Practicing herblore safely requires caution, as some herbs interact with medications or worsen health conditions․ Always source high-quality herbs, avoid overconsumption, and consult experts, especially during pregnancy or chronic illnesses․

6․1 Proper Dosage and Usage

Proper dosage and usage are critical in herblore to ensure safety and effectiveness․ Herbs can vary greatly in potency, so understanding the recommended amounts is essential․ Always start with small doses to assess tolerance, especially if you’re new to herblore․ The method of preparation, such as teas, tinctures, or infusions, affects how the body absorbs the herb․ Dosage may also depend on individual health, age, and the herb’s strength․ Consulting a trusted source or expert is vital to avoid overconsumption․ Be consistent in usage and allow time for the herb to take effect․ Overdosing can lead to adverse effects, so patience and caution are key․ Responsible usage ensures herblore remains a beneficial and risk-free practice․

6․2 Allergies and Contraindications

Allergies and contraindications are crucial considerations in herblore․ Some individuals may experience allergic reactions to specific herbs, even in small amounts․ Certain herbs, like ragweed or chamomile, can trigger allergies, especially in those sensitive to the daisy family․ Additionally, contraindications arise when herbs interfere with medical conditions, pregnancies, or medications․ For example, herbs like St․ John’s Wort can interact with antidepressants, while others like ginger may complicate blood thinning therapies․ Always consult a healthcare provider before using herbs, especially if pregnant, breastfeeding, or on medication․ Patch testing and gradual introduction can help identify allergies․ Awareness of these factors ensures safe and effective herblore practices, avoiding potential harm and ensuring therapeutic benefits․

Herblore offers timeless wisdom for health and wellness, empowering individuals to harness nature’s healing potential․ Its holistic approach fosters balance and connection to the natural world․

7․1 Final Thoughts on Herblore

Herblore is a timeless practice that bridges tradition and modernity, offering natural solutions for health and wellness․ By understanding herbs, individuals can empower themselves to take charge of their well-being, fostering a deeper connection with nature․ Whether for physical health, mental clarity, or spiritual growth, herblore provides a holistic approach that resonates with people worldwide․ Its versatility and sustainability make it a valuable resource for generations to come․ Embracing herblore is not just about using plants—it’s about adopting a lifestyle that honors the healing power of the Earth․ As you conclude this guide, remember that herblore is a journey, and every step you take brings you closer to natural harmony and balance․

7․2 Encouragement to Explore Herblore

Embrace the fascinating world of herblore and unlock its countless benefits for your health, well-being, and spiritual growth․ Whether you’re a curious beginner or a seasoned practitioner, herblore offers endless opportunities to explore and learn․ Start by experimenting with common herbs like chamomile, lavender, or sage, and discover how they can enhance your daily life․ Connect with nature and nurture your body, mind, and spirit through the ancient wisdom of plants․ Don’t be afraid to try new things—from brewing herbal teas to creating natural remedies․ Herblore is a journey of discovery, and every step you take brings you closer to a more holistic and balanced lifestyle․ Let the power of herbs inspire you to live in harmony with the natural world․

Resources for Further Learning

Explore books like “The Herbal Medicine-Maker’s Handbook” and online platforms offering courses on herblore․ Join herbalist communities to deepen your knowledge and skills in this ancient practice․

8․1 Recommended Books on Herblore

For in-depth knowledge, consider “The Herbal Medicine-Maker’s Handbook” by James Green, offering practical guides to creating herbal remedies․ “The New Holistic Herbal” by David Hoffmann provides a comprehensive overview of herbalism, blending traditional wisdom with modern science․ “Herbs for Common Ailments” by Rosemary Gladstar focuses on practical applications for everyday health issues․ These books, along with others, are essential additions to any herbalist’s library, offering a mix of historical context, scientific insights, and hands-on guidance for exploring the world of herbs․

8․2 Online Courses and Communities

Online courses and communities offer accessible ways to deepen your understanding of herblore․ Platforms like Coursera and Udemy provide structured courses on herbalism, covering topics from basic botany to advanced remedies․ Specialized schools such as The Herbal Academy and The Plant Medicine School offer comprehensive programs for both beginners and experienced practitioners․ Additionally, online communities like herbalism forums and social media groups connect enthusiasts worldwide, fostering knowledge sharing and support․ These resources enable continuous learning and collaboration, making herblore more approachable and engaging for everyone interested in harnessing the power of plants․

PDF

necromunda rulebook pdf

The Necromunda Rulebook PDF is an essential guide for players, offering comprehensive rules, gang customization, and skirmish mechanics. It streamlines gameplay, making it accessible for both new and experienced players.

What is Necromunda?

Necromunda is a tabletop skirmish wargame set in the Warhammer 40,000 universe, where players control rival gangs battling for survival and dominance in the underhive. The game is characterized by its gritty, dystopian setting, where factions of scavengers, outcasts, and warriors clash in a lawless environment. Each gang is unique, with customizable fighters, weapons, and equipment, allowing players to tailor their forces to suit their playstyle. The game emphasizes strategic combat, resource management, and narrative-driven campaigns. Necromunda combines tactical gameplay with rich lore, making it a favorite among fans of Warhammer 40k and tabletop gaming. The rulebook PDF serves as the core guide, detailing the game’s mechanics, gang creation, and campaign rules, making it essential for both new and experienced players.

The Importance of the Rulebook

The Necromunda Rulebook is a cornerstone for players, providing a comprehensive guide to the game’s mechanics, lore, and strategies. It standardizes gameplay, ensuring consistency and fairness, and offers detailed rules for building and advancing gangs. The rulebook is essential for understanding the core mechanics, such as combat, skirmishes, and campaign progression. Without it, players would lack a unified framework to navigate the complexities of the underhive. It serves as a primary reference for resolving in-game situations and clarifying ambiguities. Whether you’re a new player or a seasoned veteran, the rulebook is indispensable for fully experiencing Necromunda’s depth and richness. Its availability in PDF format makes it easily accessible, ensuring everyone can enjoy the game with a clear understanding of its rules and intricacies.

Overview of the Necromunda Rulebook PDF

The Necromunda Rulebook PDF is a detailed digital resource that encapsulates the entire game system, making it easily accessible for players worldwide. It includes the core rules, expansion content, and clarifications, ensuring a seamless gaming experience. The PDF format allows for quick reference and portability, enabling players to access critical information during gameplay. It covers essential aspects such as gang creation, combat mechanics, and campaign rules, providing a holistic view of the game. Regular updates and errata are incorporated, keeping the rulebook current with official changes. Whether you’re strategizing or resolving in-game disputes, the Necromunda Rulebook PDF serves as an invaluable companion, offering everything needed to immerse yourself in the gritty world of the underhive. Its comprehensive nature simplifies the complexity of the game, making it a must-have for all players.

Core Rules and Gameplay Mechanics

The Necromunda Rulebook PDF outlines the game’s core systems, including turn-based combat, model stats, and the use of templates and dice, forming the foundation of gameplay.

Basic Requirements to Play Necromunda

To start playing Necromunda, you’ll need a few essential items. First, you’ll require a copy of the Necromunda Rulebook PDF, which contains all the core rules and gameplay mechanics. Next, you’ll need miniatures representing your gang, which can be purchased from Games Workshop or crafted DIY-style. Each model must be equipped with specific weapons and gear, as outlined in the rulebook. Additionally, you’ll need a set of dice, including six-sided dice (D6) for resolving combat, movement, and skill checks. Templates for measuring distances and areas of effect are also crucial, and these can be found in the rulebook or purchased separately. Finally, a battlefield terrain setup is necessary to create the Underhive environment, though makeshift terrain can be used if official sets are unavailable. With these basics, you’re ready to dive into the gritty world of Necromunda and begin your gang’s journey to supremacy.

Building and Improving Gangs

Building and improving gangs is a core aspect of Necromunda, and the rulebook provides detailed guidance on this process. Starting with basic recruits, players can customize their fighters by assigning attributes, skills, and equipment. As gangs gain experience through battles, they earn credits and advancement points to upgrade their fighters. Injuries and deaths add a layer of strategy, as players must manage their gang’s survival and growth. The rulebook outlines clear rules for recruiting new members, trading equipment, and even forming alliances or rivalries with other gangs. Additionally, it explains how to track progression, handle injuries, and adapt to the evolving Underhive environment. This system allows for deep customization and long-term storytelling, making each gang unique and dynamic over time. The Necromunda Rulebook PDF ensures that building and improving gangs is both intuitive and rewarding.

Combat and Skirmish Rules

The combat and skirmish rules in the Necromunda Rulebook PDF detail a dynamic turn-based system where players alternate activating fighters. The initiative system determines the order of actions, adding unpredictability. Combat is divided into clear phases: movement, shooting, and close combat. Fighters can use cover to gain advantages, and templates are essential for resolving ranged attacks and explosions. The rules also cover advanced mechanics like vehicle combat and weather effects, such as ash storms, which can impact gameplay. These systems create a tactical and immersive experience, emphasizing strategy and adaptability. The Necromunda Rulebook PDF ensures that combat is both balanced and engaging, providing depth for players to master.

Role of Dice and Templates in Gameplay

Dice and templates are integral to Necromunda, driving gameplay mechanics and determining outcomes. The Necromunda Rulebook PDF outlines how dice rolls govern actions like shooting, close combat, and skill checks. A D6 is used for most resolutions, with modifiers adjusting success thresholds. Templates are essential for measuring distances, blast areas, and line of sight, ensuring clarity in skirmishes. The initiative system, also dice-based, adds unpredictability to turn order. Players must adapt strategies based on dice outcomes, making each game dynamic. The rulebook provides clear instructions on using these tools, ensuring fairness and immersion. Dice and templates create a balanced yet unpredictable environment, central to the game’s tactical depth and player engagement. They are indispensable for executing the game’s core mechanics effectively.

Supplementary Materials and Expansions

The Necromunda Rulebook PDF is complemented by expansions like The Ash Wastes and Gangs of the Underhive, adding depth with vehicle rules, weather effects, and gang customization options.

The Ash Wastes Rulebook

The Ash Wastes Rulebook is a key expansion for Necromunda, introducing detailed rules for vehicle combat, ash wastes weather effects, and expansive campaign systems. It enhances gameplay by adding layers of strategy and depth, particularly for gangs operating in the harsh environments of the ash wastes. The rulebook is highly comprehensive, making it a must-have for players seeking advanced gameplay mechanics. However, it can be challenging to obtain, as it is often only available second-hand or through expensive boxed sets. Despite this, the Ash Wastes Rulebook remains a cornerstone of Necromunda lore and gameplay, offering unparalleled depth for enthusiasts of the game.

Necromunda PDF collections often include these rules, providing an accessible alternative for players.

Gangs of the Underhive (GOTU)

Gangs of the Underhive (GOTU) is a supplementary rulebook for Necromunda that focuses on detailing the various gangs, their unique traits, and the scenarios they encounter in the underhive. It provides in-depth rules for creating and customizing gangs, including their weapons, equipment, and special abilities. GOTU also introduces new scenarios and campaign rules, allowing players to immerse themselves in the gritty world of Necromunda. The book is particularly useful for players looking to expand their gameplay beyond the core rules. However, it has become challenging to obtain, as Games Workshop has shifted focus to individual gang codexes. Despite this, GOTU remains a beloved resource among fans, offering rich lore and strategic depth. Many players rely on the Necromunda PDF collections to access its content digitally.

House of Blades and Other Codexes

House of Blades is a codex specifically designed for the Escher gang in Necromunda, detailing their unique background, weapons, and strategies. It expands on the core rules, offering new scenarios and rules for gang customization. Other codexes, such as The Book of Peril, provide additional content for other factions, enhancing gameplay with new weapons, skills, and campaign options. These codexes are essential for players seeking deeper immersion and strategic variety. However, accessing physical copies can be challenging, as some are out of print or expensive. The Necromunda PDF collections have become a vital resource, compiling these codexes and updates for easy access. They ensure players can enjoy the full depth of the game without missing out on critical expansions.

Campaign Rules and Weather Effects

The Ash Wastes Rulebook introduces dynamic campaign rules and weather effects, enhancing the game’s strategic depth. Weather conditions like ash storms and dust devils impact gameplay, requiring players to adapt their tactics. These environmental challenges add unpredictability, making battles more immersive and challenging. The campaign rules allow gangs to earn experience, unlock new skills, and progress through a narrative journey. This system ensures long-term engagement, as each battle contributes to the gang’s overall story and development. The integration of weather effects and campaign rules creates a richer, more dynamic gameplay experience, making the Necromunda Rulebook PDF an indispensable resource for players seeking depth and variety in their games.

Community Resources and Fan Contributions

Yak Tribe and other fan communities provide invaluable tools and resources, enhancing gameplay and accessibility. Their contributions include custom rulebooks, updates, and online forums fostering collaboration and innovation among players.

Yak Tribe and Community Tools

The Yak Tribe and other community tools have become indispensable for Necromunda players. These resources compile rules from various books, making it easier for players to access and understand the game mechanics. The Yak Tribe, in particular, is renowned for its comprehensive guides and updates, which are regularly maintained by the community. These tools help players navigate the complexity of the rulebooks, ensuring that everyone can enjoy the game without getting overwhelmed by the sheer amount of information. Additionally, fan contributions include custom rulebooks, campaign settings, and scenario ideas, further enriching the gameplay experience. The collaborative nature of these community efforts has fostered a vibrant and supportive environment for both new and experienced players alike.

Fan-Written Rulebooks and Updates

Fan-written rulebooks and updates have become a vital resource for the Necromunda community. These unofficial guides are created by dedicated players who compile and organize rules from various sources, including the core rulebook, expansions, and FAQs. Often available as free PDFs, these resources are regularly updated to reflect new releases and community feedback. They provide streamlined versions of the rules, making it easier for players to navigate the game’s complexity. Many fan-written rulebooks also include clarifications and house rules, offering alternative ways to play. These community-driven projects highlight the passion and creativity of the Necromunda fanbase, ensuring the game remains accessible and enjoyable for everyone. They are a testament to the collaborative spirit of the hobby and its dedicated enthusiasts.

Online Forums and Discussions

Online forums and discussions are vibrant hubs for the Necromunda community, offering invaluable resources and support. Platforms like Reddit, Facebook groups, and specialized hobby forums are filled with players sharing strategies, asking questions, and discussing rules. These spaces are crucial for clarifying complex rules, debating interpretations, and learning from experienced players. Fans often post tutorials, custom scenarios, and tips for improving gameplay. Discussions about the Necromunda Rulebook PDF frequently appear, with players exchanging advice on how to navigate its contents effectively. These forums also host announcements about new updates, expansions, and community projects. By fostering collaboration and knowledge-sharing, online discussions help keep the game dynamic and engaging, ensuring players of all skill levels can thrive in the gritty world of Necromunda.

Practical Advice for New Players

Start with the Hive War starter set and the Necromunda Rulebook. Focus on building a solid foundation with essential books like Gangs of the Underhive. Use the PDF to navigate rules efficiently.

Starter Sets and Essential Books

New players should begin with the Hive War boxed set, which provides the core rules and essential components to start playing. The Necromunda Rulebook is a must-have, offering detailed gameplay mechanics and background lore. Additionally, Gangs of the Underhive (GOTU) is highly recommended for gang customization, though it can be challenging to find due to limited printing. For those looking for a streamlined experience, the Necromunda PDF is an excellent resource, compiling all the necessary rules in one accessible file. This PDF is regularly updated to include new content and clarifications, making it a valuable tool for both new and experienced players. By starting with these materials, players can build a strong foundation and dive into the gritty world of Necromunda with confidence.

Navigating the Complexity of Rulebooks

The Necromunda Rulebook PDF is a comprehensive resource, but its depth can be overwhelming for new players. To navigate its complexity, start by focusing on the core rules and gradually explore expansions. Prioritize understanding the basic gameplay mechanics, such as gang composition, combat, and campaign systems. The PDF includes detailed sections on building and improving gangs, which are essential for long-term play. Additionally, the Ash Wastes Rulebook offers advanced rules, including vehicle combat and weather effects, but it’s best approached after mastering the basics. Utilize the index and FAQ sections to quickly find specific rules. Finally, leverage community tools like Yak Tribe to simplify rulebook management and stay updated on errata and clarifications. Patience and practice are key to mastering the intricate world of Necromunda.

Using the Necromunda PDF Effectively

To maximize the use of the Necromunda Rulebook PDF, focus on its organized structure and supplementary materials. Start by reviewing the core rules and gang-building sections to establish a strong foundation. Use the PDF’s bookmarks and search functionality to quickly locate specific rules or expansions, such as the Ash Wastes Rulebook or Gangs of the Underhive. Refer to the FAQ and errata sections for clarifications on ambiguous rules. Additionally, leverage community tools like Yak Tribe for updated rulesets and fan contributions. For beginners, prioritize the starter sets and essential books before diving into advanced content. Regularly update your PDF to ensure you have the latest rules and expansions. By organizing your resources and utilizing digital tools, you can enhance your gameplay experience and stay ahead in the Underhive.

FAQs and Common Questions

Players often seek clarifications on rules, misprints, and FAQs. The Necromunda Rulebook PDF addresses these queries, providing official errata and updates to ensure smooth gameplay and fairness.

Clarifications on Rules and Errata

The Necromunda Rulebook PDF often requires clarifications due to the complexity of its rules. Official errata and FAQs are regularly released to address common queries and misprints. These updates ensure balanced gameplay and provide clear interpretations of ambiguous rules. Players frequently seek answers about gang building, combat mechanics, and campaign rules. The Ash Wastes Rulebook, for instance, introduced new weather effects and vehicle rules that needed further explanation. Community resources like Yak Tribe tools and fan-written guides also help players navigate these clarifications. Additionally, misprints in earlier editions have been corrected in updated versions of the PDF. For the most accurate information, players are advised to refer to the latest official releases and community discussions. This ensures everyone has a consistent and fair gaming experience.

Misprints and Official FAQs

Misprints in the Necromunda Rulebook PDF are occasional, leading to confusion among players. Games Workshop periodically releases official FAQs to address these issues, ensuring clarity and consistency. These FAQs cover various aspects of the game, from gang construction to advanced combat scenarios. For example, the Ash Wastes Rulebook introduced new vehicle rules that required further clarification. Players are encouraged to check the latest FAQs to stay updated on rule interpretations. Additionally, the community often highlights common misprints, helping to identify and rectify errors. While the PDF format allows for easy updates, some players prefer physical copies, which may not reflect the latest changes. Remaining informed through official channels and community discussions is crucial for a smooth gaming experience. This collaborative effort keeps the game balanced and enjoyable for all players.

Where to Find the Necromunda Rulebook PDF

The Necromunda Rulebook PDF can be sourced from various official and community-driven platforms. The primary source is the Games Workshop website, where it is available for purchase as part of their digital library. Additionally, third-party marketplaces like Amazon or eBay may offer physical copies, though availability can vary. Fans often share the PDF through forums and community groups, such as the Yak Tribe or other dedicated Necromunda forums. Some enthusiasts have compiled comprehensive PDFs that combine core rules, expansions, and FAQs, making them easily accessible for new players. Always ensure that downloads are from trusted sources to avoid unofficial or outdated versions. For the most up-to-date content, checking the official Games Workshop updates is recommended. This ensures players have the latest rules and expansions integrated into their Necromunda Rulebook PDF.

The Necromunda Rulebook PDF is a vital resource for players, offering detailed rules, updates, and expansions. It enhances gameplay and provides a comprehensive guide for both newcomers and veterans alike.

The Future of Necromunda Rulebooks

The future of Necromunda Rulebooks looks promising, with ongoing updates and expansions expected to enhance gameplay. The Ash Wastes Rulebook and Gangs of the Underhive (GOTU) have set a high standard, and fans anticipate more comprehensive resources. Community-driven tools, like Yak Tribe, continue to play a vital role in organizing rules and updates. As Games Workshop releases new content, the rulebooks are likely to evolve, incorporating feedback from players. Digital formats, such as the Necromunda PDF, will remain essential for accessibility and convenience. With a strong focus on community engagement and balanced rule updates, the rulebooks will continue to support the game’s growth and complexity, ensuring Necromunda remains a dynamic and engaging tabletop experience for years to come.

Final Thoughts on the Necromunda Rulebook PDF

The Necromunda Rulebook PDF is an indispensable resource for players, offering a detailed and organized guide to the game. It provides clarity on core rules, expansions, and customizations, making it a must-have for both newcomers and seasoned players. The PDF’s digital format ensures easy access and updates, keeping players informed about the latest changes and expansions. Community contributions, such as fan-written updates and tools, further enhance its value. While the sheer volume of rules can be overwhelming, the PDF serves as a central hub for navigating Necromunda’s complexity. Its comprehensive coverage of gangs, skirmish mechanics, and campaign rules solidifies its role as the go-to reference for the game. Whether you’re building a gang or diving into advanced strategies, the PDF remains a vital companion for every Necromunda enthusiast.

iq panel 4 manual

Welcome to the IQ Panel 4 Manual, your comprehensive guide to understanding and mastering the IQ Panel 4 system․ This manual provides essential information to help you navigate, configure, and optimize your security and smart home experience․

1․1 Overview of the IQ Panel 4

The IQ Panel 4 is a cutting-edge security and smart home control system designed to streamline your security, automation, and monitoring needs․ With its intuitive touch screen interface and advanced features, it serves as the central hub for managing your home’s safety and convenience․ The panel integrates seamlessly with security cameras, door locks, thermostats, and other smart devices, offering a unified control experience․ Its remote access capabilities and voice control compatibility make it a modern, user-friendly solution for homeowners and businesses alike․ The IQ Panel 4 is engineered to provide reliability, scalability, and innovation, ensuring your space is secure, efficient, and effortlessly managed․

1․2 Importance of the Manual for Users

This manual is an essential resource for anyone using the IQ Panel 4, providing detailed insights into its operation, features, and customization options․ It helps users understand the system’s full potential, ensuring they can set up, configure, and maintain their security and smart home devices effectively․ By following the manual, users can avoid common mistakes, troubleshoot issues, and make informed decisions about their system’s settings․ Whether you’re a new user or looking to optimize your current setup, this guide serves as a comprehensive reference to maximize your IQ Panel 4 experience, ensuring safety, convenience, and efficiency in your home or business environment․ Always refer to this manual for clarity and confidence in using your system․

Installation and Setup Guide

This section provides a detailed guide to installing and setting up your IQ Panel 4, ensuring a smooth and secure integration into your home or business environment․

2․1 Compatibility and System Requirements

The IQ Panel 4 is designed to work seamlessly with a variety of systems and devices․ Ensure your setup meets the minimum requirements, including compatible operating systems, internet connectivity, and power supply․ Check the hardware specifications to confirm compatibility with your existing security and smart home devices․ Verify that your network supports the necessary bandwidth for optimal performance․ Additionally, review the software version requirements to ensure all integrated systems are up to date․ Properly assessing these factors will ensure a smooth installation and reliable operation of your IQ Panel 4 system․ Always refer to the official compatibility list for the most accurate information․

2․2 Step-by-Step Installation Process

Begin by carefully unpacking the IQ Panel 4 and ensuring all components are included․ Power on the system and follow the on-screen instructions to select your language and location․ Next, connect the panel to your network using Wi-Fi or an Ethernet cable․ Complete the initial setup by creating a user account and setting a security PIN․ Mount the panel on a wall or place it on a flat surface, ensuring stability․ Connect any sensors or devices to the panel according to the manufacturer’s guidelines․ Finally, test all features to ensure proper functionality․ Refer to the provided quick-start guide for visual assistance․

2․3 Initial Configuration and Settings

After installation, access the configuration menu to set up core functionalities․ Start by creating user accounts with unique passwords and assign access levels․ Enable security features like arming/disarming schedules and notification preferences․ Configure system preferences such as time zones, date formats, and language settings․ Pair sensors and devices with the panel, ensuring proper zones are assigned for accurate alerts․ Review and customize default settings to align with your security and automation needs․ Save your configurations and perform a test run to ensure all systems operate smoothly․ Proper initial setup is crucial for optimal performance and security․

Navigating the IQ Panel 4 Interface

Explore the IQ Panel 4’s intuitive interface, designed for seamless navigation․ Access critical functions from the home screen, manage settings through menus, and customize your experience effortlessly․

3․1 Understanding the Home Screen

The Home Screen is the central hub of the IQ Panel 4, providing quick access to essential features and system status․ It displays key information such as security status, connected devices, and system alerts․ Customize the layout by adding or removing widgets to suit your preferences․ Use the Home Screen to monitor your security system, control smart home devices, and view notifications․ Navigate through the interface by swiping or tapping on menu icons to access additional settings and features․ This intuitive design ensures easy access to critical functions, making it simple to manage your system efficiently․

3․2 Accessing and Managing Menus

To access the menus on the IQ Panel 4, swipe down from the top of the screen or tap the menu icon․ The main menu provides access to Security, Smart Home, and System Settings․ Customize your menu layout by dragging and dropping items or hiding unused options․ Use the favorites feature to create shortcuts for frequently used functions․ Edit or delete favorites by holding down on an item and selecting the appropriate option․ The menu system is designed for ease of use, allowing you to quickly navigate and adjust settings․ This flexibility ensures a personalized experience tailored to your needs․

3․3 Customizing Your Dashboard

Customizing your IQ Panel 4 dashboard allows you to tailor the interface to your preferences․ Start by tapping and holding a widget to enter edit mode; Drag and drop widgets to rearrange them or adjust their size for optimal viewing․ Add new widgets by selecting the “+” icon, choosing from options like security cameras, smart locks, or thermostats․ Remove unused widgets by dragging them to the trash icon․ Use the “Reset Layout” option to revert to the default setup․ Customize colors, themes, and transparency to enhance visual appeal․ Save your preferences to ensure your unique configuration is preserved․ This feature ensures your dashboard is both functional and visually appealing, tailored to your lifestyle and needs․ Explore these options to create a personalized experience․

Basic Features and Functionality

Explore the IQ Panel 4’s core capabilities, including robust security monitoring, seamless smart home automation, and intuitive voice control․ These features work together to simplify and enhance your daily life․

4․1 Security Features Overview

The IQ Panel 4 offers advanced security features designed to protect your home and family․ It includes intrusion detection, fire and carbon monoxide alerts, and video monitoring․ The system integrates seamlessly with security cameras, door locks, and motion sensors, providing real-time alerts and notifications․ With customizable arming modes and biometric authentication, you can ensure only authorized users access the system․ The IQ Panel 4 also supports two-way voice communication with monitoring centers, enhancing emergency response capabilities․ These features create a robust security ecosystem, giving you peace of mind whether you’re at home or away․

4․2 Automation and Smart Home Integration

The IQ Panel 4 seamlessly integrates with smart home devices, enabling comprehensive automation․ Control lights, thermostats, security cameras, and door locks directly from the panel or through the app․ Voice control compatibility with platforms like Amazon Alexa and Google Assistant enhances convenience․ Customizable scenes and routines allow you to automate multiple actions with a single command, such as turning off lights and arming the system when leaving home․ The system also supports smart home protocols like Z-Wave and Zigbee, ensuring compatibility with a wide range of devices․ This integration simplifies your lifestyle, offering a unified and efficient smart home experience tailored to your needs and preferences․

4․3 Voice Control and Remote Access

Experience enhanced convenience with the IQ Panel 4’s voice control and remote access features․ Compatible with Amazon Alexa and Google Assistant, the system allows you to manage security, lights, and thermostats hands-free․ The IQ Panel 4 app provides remote access, enabling you to monitor your system, receive alerts, and control devices from anywhere․ Voice commands simplify daily routines, while remote capabilities ensure you stay connected to your home․ Biometric authentication and secure encryption protect your remote interactions, ensuring your system remains safe․ These features empower you to control and monitor your home seamlessly, offering flexibility and peace of mind whether you’re at home or away․

Advanced Settings and Configuration

Delve into the IQ Panel 4’s advanced settings to tailor your system for optimal performance․ Explore customization options, user permissions, and integration capabilities to enhance your security and smart home experience․

5․1 User Permissions and Access Levels

Managing user permissions and access levels on the IQ Panel 4 ensures secure and controlled system operation․ Administrators can create multiple user profiles with varying levels of access, from full system control to limited functionality․ Access levels include Administrator, User, and Guest, each with predefined privileges․ Users can be granted access to specific features like arming/disarming, scene control, or viewing system history․ Custom permissions allow fine-tuned control, ensuring only authorized individuals can modify settings or access sensitive data․ This feature enhances security and prevents unauthorized changes, making it essential for both residential and commercial installations․ Use the Settings menu to configure and manage these permissions effectively․

5․2 Custom Scenes and Routines

Custom scenes and routines on the IQ Panel 4 allow users to automate multiple actions with a single command, enhancing convenience and efficiency․ Scenes can be tailored to specific situations, such as “Good Morning” or “Leaving Home,” and include actions like turning off lights, arming the system, or adjusting thermostats․ Routines, on the other hand, enable scheduling of automated tasks, like locking doors or activating outdoor lights at sunset․ Both scenes and routines can be easily created and edited via the system dashboard․ This feature simplifies smart home management and provides a seamless, personalized experience, making it easier to enjoy a connected lifestyle․

5․3 Integrating Third-Party Devices

Integrating third-party devices with the IQ Panel 4 enhances its functionality and creates a unified smart home system․ The panel supports devices from leading manufacturers, including Zigbee and Z-Wave compatible products, as well as voice assistants like Amazon Alexa and Google Home․ Users can seamlessly connect smart lights, thermostats, locks, and cameras to the IQ Panel 4, ensuring all devices work together harmoniously․ To integrate, simply pair the device through the panel’s settings, following the manufacturer’s pairing instructions․ This feature allows for a customized and expandable system, giving users greater control over their home’s security and automation․ Regular updates ensure compatibility with the latest devices and technologies․

Troubleshooting Common Issues

Integrating third-party devices with the IQ Panel 4 enhances its functionality and creates a unified smart home system․ The panel supports devices from leading manufacturers, including Zigbee and Z-Wave compatible products, as well as voice assistants like Amazon Alexa and Google Home․ Users can seamlessly connect smart lights, thermostats, locks, and cameras to the IQ Panel 4, ensuring all devices work together harmoniously․ To integrate, simply pair the device through the panel’s settings, following the manufacturer’s pairing instructions․ This feature allows for a customized and expandable system, giving users greater control over their home’s security and automation․ Regular updates ensure compatibility with the latest devices and technologies․

6․1 Identifying and Resolving Connectivity Problems

Connectivity issues with the IQ Panel 4 can often be resolved by checking the internet connection and ensuring all devices are properly paired․ If the panel loses connection to the network, restart the router and modem, then reboot the panel․ For wireless sensors or cameras, verify they are within range and free from interference․ If devices fail to connect, check their pairing status in the settings menu and re-pair if necessary․ Firmware updates should also be checked regularly to ensure compatibility․ If problems persist, resetting the panel to factory settings may be required, but this should be done as a last resort․ Always refer to the manual for detailed troubleshooting steps․

6․2 Managing Software Updates and Firmware

Regular software updates and firmware upgrades are crucial for maintaining the IQ Panel 4’s performance and security․ To check for updates, navigate to the “Settings” menu and select “System Update․” The panel will automatically search for available updates and prompt you to install them․ Ensure the panel is connected to the internet during this process․ Once an update is installed, the system may restart to apply changes․ Firmware updates for connected devices can be managed similarly through their respective settings․ Always install updates promptly to benefit from the latest features, security patches, and bug fixes․ If an update fails, restart the panel and retry the process․ For persistent issues, contact customer support for assistance․

6․3 Resetting the IQ Panel 4 to Factory Settings

Resetting the IQ Panel 4 to factory settings restores it to its default configuration, erasing all customizations and data․ This process is useful for resolving persistent issues or preparing the panel for transfer․ To reset, go to the “Settings” menu, select “Advanced Settings,” and enter your administrator password․ Choose “Factory Reset” and confirm your action․ The panel will reboot, returning to its original settings․ Note that this will remove all user accounts, custom scenes, and integrated devices․ After the reset, you’ll need to reconfigure the system․ Ensure you back up important settings before proceeding․ If issues persist, contact technical support for further assistance․

Maintenance and Best Practices

Regular maintenance ensures optimal performance of your IQ Panel 4․ Keep software updated, clean the touchscreen, and monitor device batteries to maintain reliability and security;

7․1 Regular System Checks and Updates

Performing regular system checks ensures your IQ Panel 4 operates smoothly․ Check for software updates monthly and install them promptly to benefit from new features and security patches․ Inspect all sensors and devices for proper functionality and connectivity․ Test alarm triggers and automation routines to confirm reliability․ Address any issues promptly, such as low battery warnings or connectivity drops, to prevent system downtime․ Regular maintenance helps maintain peak performance and keeps your home secure and automated․ A well-maintained system reduces the risk of malfunctions and ensures all features work seamlessly together․

7․2 Optimizing Battery Life for Wireless Devices

To maximize battery life for wireless devices connected to your IQ Panel 4, ensure they are placed in areas with strong signal strength․ Weak signals can drain batteries faster․ Adjust device settings, such as reducing the frequency of status updates or lowering sensitivity, to conserve power; Use high-quality, rechargeable batteries and avoid mixing old and new ones․ Regularly check battery levels through the panel’s interface and replace or recharge them when levels drop below 20%․ Clean battery terminals to prevent corrosion․ Finally, update your devices’ firmware to benefit from potential battery-optimization improvements․ These practices will extend the lifespan of your wireless devices․

7․3 Securing Your System from Unauthorized Access

To ensure the security of your IQ Panel 4 system, start by creating strong, unique passwords for all user accounts․ Enable two-factor authentication whenever possible․ Regularly review and update access permissions to reflect current user roles․ Monitor login attempts and restrict access to trusted devices or IP addresses․ Keep your system’s firmware updated to protect against vulnerabilities․ Use encryption for remote access and disable any unused features or ports․ Additionally, educate all users about phishing and other common security threats․ By taking these steps, you can significantly reduce the risk of unauthorized access and safeguard your system and data․

simrad go7 user manual

Welcome to the Simrad GO7 user manual, your comprehensive guide to understanding and utilizing the device’s features effectively. This manual provides detailed instructions for installation, operation, and customization, ensuring you get the most out of your GO7. Access the manual via the built-in PDF viewer or download it from simrad-yachting.com for offline use. Reading this manual carefully will help you configure the device properly, troubleshoot issues, and enhance your overall boating experience with the GO7’s advanced sonar, GPS, and radar capabilities.

1.1 Overview of the Simrad GO7 Device

The Simrad GO7 is a compact, feature-packed multifunction display designed for boaters seeking advanced navigation and sonar capabilities. It features a touchscreen interface, CHIRP sonar technology, and GPS navigation, offering precise depth readings and fish detection. The device is built with a rugged, waterproof casing to withstand harsh marine environments. Its user-friendly interface provides clear charts and customizable settings, making it ideal for both novice and experienced users. The GO7 is perfect for smaller sportboats, combining durability, reliability, and cutting-edge marine technology.

1.2 Importance of Reading the Manual

Reading the Simrad GO7 user manual is essential for maximizing the device’s potential and ensuring safe, effective use. It provides detailed instructions for installation, configuration, and operation, helping you navigate features like sonar, GPS, and radar. The manual also offers troubleshooting tips and maintenance advice, preventing potential issues. Neglecting to read it may lead to improper setup or underutilization of advanced functionalities. Regularly updated versions are available at simrad-yachting.com, ensuring you access the latest guidance for optimal performance.

1.3 How to Access the Manual

To access the Simrad GO7 manual, use the built-in PDF viewer or download it from simrad-yachting.com. Manuals can be read from a card or copied to internal memory. Navigate the PDF using menu options like search, page up/down, and more. This ensures easy access to guidance for effective use of your GO7.

Installation of the Simrad GO7

The GO7 can be mounted using the U-bracket, following the installation manual’s guidance. Ensure the bracket is securely fastened to withstand marine conditions.

2.1 Pre-Installation Requirements

Before installing the Simrad GO7, ensure compatibility with your boat’s power supply and marine environment. Review the manual to understand system requirements and prepare necessary tools and cables. Ensure the mounting location is stable and suitable for the device’s size and weight. Properly plan the installation to avoid damage to the unit or your vessel. Correct installation is crucial for optimal performance and reliability of the Simrad GO7.

2.2 Mounting the GO7 Device

The Simrad GO7 can be mounted using the included U-bracket, ideal for smaller sportboats. Ensure the mounting location is stable, level, and provides clear visibility. Avoid areas exposed to excessive water or direct sunlight. Secure the bracket firmly to prevent vibration or movement. The GO7’s compact design allows for flexible installation on various boat sizes. Proper mounting ensures optimal performance and longevity of the device, while incorrect installation may lead to malfunctions or reduced accuracy in sonar and GPS readings.

2.3 Connecting External Components

Connect external components like sonar transducers, radar units, or GPS antennas to the GO7 according to the manufacturer’s guidelines. Use the appropriate ports and cables to ensure secure connections. Refer to the manual for specific instructions on wiring and compatibility. Properly connecting these components is crucial for optimal performance, enabling accurate sonar readings, reliable navigation, and enhanced functionality. Ensure all connections are tight and protected from moisture to maintain system reliability and avoid malfunctions during operation.

Getting Started with the Simrad GO7

Power on the GO7, then navigate the intuitive touchscreen interface. Access the built-in PDF viewer to review the manual for detailed setup and operation guidance.

3.1 Powering On the Device

To power on the Simrad GO7, locate the power button, typically found on the top or side of the unit. Press and hold it until the screen lights up and the startup sequence begins. Ensure the device is properly connected to a power source. Once powered on, the GO7 will initialize its systems, including GPS and sonar. If the device does not turn on, check the power connections or refer to the troubleshooting section for assistance.

3.2 Navigating the User Interface

The Simrad GO7 features a user-friendly, multi-touch interface designed for intuitive navigation. Use gestures like tapping, swiping, and pinching to interact with maps, menus, and settings. The home screen provides quick access to key functions, with customizable shortcuts for your most-used features. Press the menu button to access additional settings or toggle between open pages. The interface is responsive, ensuring smooth operation even in harsh marine environments. Familiarize yourself with the layout to enhance your efficiency while using the device.

3.3 Accessing the Built-in PDF Viewer

The Simrad GO7 includes a built-in PDF viewer, allowing you to access and read manuals or other PDF files directly on the device. Manuals can be viewed from a card inserted into the card reader or copied to the unit’s internal memory. Use the on-screen buttons and menu options to navigate through PDF files, with features like page up/down, search, and zoom for easy reading. This feature ensures you always have essential information at your fingertips while operating the GO7.

Key Features of the Simrad GO7

The Simrad GO7 offers a rugged, waterproof design, touchscreen functionality, and advanced CHIRP sonar technology for precise fish detection. It features GPS navigation, customizable displays, and wireless connectivity, ensuring enhanced marine experiences with ease and versatility.

4.1 Touchscreen Functionality

The Simrad GO7 features an intuitive touchscreen interface designed for easy navigation and operation. Users can pinch-to-zoom, swipe between pages, and tap on-screen buttons for quick access to settings and functions. The responsive display allows for smooth interaction, even in rough marine conditions. The touchscreen functionality enhances usability, making it simple to adjust sonar settings, view charts, and access menus. This feature ensures a seamless and user-friendly experience while on the water.

4.2 CHIRP Sonar Technology

The Simrad GO7 incorporates advanced CHIRP Sonar Technology, delivering precise depth readings and enhanced fish detection. By emitting a wide range of frequencies, CHIRP provides detailed images of underwater structures and targets, improving accuracy for anglers. This technology minimizes interference and offers clearer differentiation between fish and other objects, ensuring reliable data for informed decision-making while fishing or navigating. The GO7’s CHIRP sonar is a key feature, making it an essential tool for marine enthusiasts seeking superior underwater insights.

4.3 GPS Navigation Capabilities

The Simrad GO7 features advanced GPS navigation, offering precise location tracking and route planning. With detailed charts and real-time data, users can confidently navigate marine environments. The device supports waypoint marking and route creation, enhancing fishing and boating experiences. Its integration with CHIRP sonar and radar ensures comprehensive situational awareness. The GPS capabilities are designed for accuracy and ease of use, making the GO7 an indispensable tool for anglers and boaters seeking reliable navigation solutions on the water.

Operating the Simrad GO7

Mastering the GO7’s operation involves navigating its intuitive interface, utilizing menu options, and accessing features like sonar, radar, and GPS. This section guides you through effective device operation.

5.1 Using the Menu Options

The Simrad GO7 features an intuitive menu system designed for easy navigation. Users can access various settings and features by tapping on menu icons or using on-screen buttons. The menu allows customization of display settings, sonar configurations, and GPS options. Organize your favorite settings for quick access. Utilize the touch screen to scroll through options, adjust parameters, and save preferences. This section explains how to navigate and customize the menu effectively to enhance your fishing and navigation experience with the GO7.

5.2 Customizing Display Settings

Customize your Simrad GO7 display to suit your preferences and viewing conditions. Adjust screen brightness and contrast for optimal visibility. Select from various color schemes to enhance readability in different lighting environments. Configure split-screen views to display multiple data types, such as charts, sonar, and radar, simultaneously. Customize data overlays and ensure your display is tailored to your specific needs. Use the on-screen menu options to save personalized settings for quick access, ensuring a seamless and efficient user experience while navigating or fishing.

5.3 Utilizing Sonar and Radar Features

The Simrad GO7 offers advanced sonar and radar capabilities for enhanced navigation and fish detection. Use CHIRP sonar technology for precise depth readings and detailed fish targeting. Adjust sensitivity and gain settings to optimize sonar performance. Radar integration provides real-time data on weather patterns and nearby obstacles. Customize radar settings to focus on specific ranges or targets. Utilize split-screen views to simultaneously monitor sonar and radar data, ensuring comprehensive situational awareness for safe and effective boating operations in various marine conditions.

Customizing Your Simrad GO7 Experience

Customize your GO7 to suit your preferences by adjusting screen brightness, contrast, and creating custom profiles. Set alerts for specific depth or navigation triggers to enhance your experience.

6.1 Adjusting Screen Brightness and Contrast

Adjusting the screen brightness and contrast on your Simrad GO7 ensures optimal visibility in various lighting conditions. Access the display settings through the menu options, where you can fine-tune brightness and contrast levels using sliders. This feature helps reduce glare in direct sunlight or preserves night vision in low-light environments. Properly configuring these settings enhances your overall viewing experience, making it easier to interpret sonar data, charts, and other critical information on the screen.

6.2 Setting Up Custom Profiles

Custom profiles on the Simrad GO7 allow you to tailor settings to specific fishing conditions or user preferences. Access the profile menu to create, edit, or delete profiles. Each profile can store unique configurations for sonar, GPS, and display settings. Save profiles for different fishing modes, such as shallow water or deep-sea fishing, ensuring quick adjustments. This feature enhances versatility, enabling you to optimize your device for various scenarios without recalibrating settings each time, improving efficiency and overall user experience.

6.3 Configuring Alerts and Notifications

The Simrad GO7 allows you to configure alerts and notifications to stay informed about critical events. Set up depth alarms, navigation alerts, or system status updates. Access the alert settings through the menu options and customize notifications to suit your preferences. Enable or disable specific alerts to avoid distractions. Use audible or visual cues for important notifications, ensuring you stay aware of key information while operating the device. This feature enhances safety and convenience, keeping you informed without constant monitoring.

Advanced Features of the Simrad GO7

The Simrad GO7 offers advanced features like radar integration, fish detection, and weather chart overlays, enhancing navigation and fishing experiences with precise data and real-time updates.

7.1 Radar Integration

The Simrad GO7 supports advanced radar integration, offering real-time data on weather patterns, obstacles, and marine traffic. This feature enhances situational awareness, enabling safer navigation and maneuvering. With radar, users can track storms, avoid collisions, and monitor surroundings effectively. The GO7 seamlessly connects with compatible radar systems, providing a comprehensive view of the environment. This integration is particularly useful for boaters needing precise data to make informed decisions at sea, ensuring a more controlled and secure boating experience.

7.2 Fish Detection and Depth Readings

The Simrad GO7 excels in fish detection and precise depth readings thanks to its advanced CHIRP sonar technology. This feature provides clear and detailed images of underwater structures, fish schools, and bottom contours. Users can customize settings to optimize performance in various water conditions, ensuring accurate data for successful fishing trips. The device also minimizes noise interference, delivering reliable readings even in challenging environments, making it an essential tool for anglers seeking to maximize their fishing efficiency and success.

7.3 Weather and Chart Integration

The Simrad GO7 seamlessly integrates weather data and chart functionality, enhancing your navigation experience. Users can access real-time weather updates and detailed charts, ensuring informed decision-making on the water. The device supports various chart formats and allows for weather data overlay, providing a comprehensive view of your surroundings. This integration is crucial for planning routes, avoiding adverse conditions, and optimizing your time on the water. The GO7’s chartplotter functionality, combined with weather insights, offers precision and reliability for safe and efficient navigation.

Troubleshooting Common Issues

Troubleshooting the Simrad GO7 involves diagnosing connectivity, sonar, and software issues. Refer to the manual for step-by-step solutions to resolve malfunctions and ensure optimal device performance.

8.1 Resolving Connectivity Problems

Connectivity issues with the Simrad GO7 can often be resolved by checking cable connections and ensuring all components are securely linked. Power cycling the device may also restore functionality. If problems persist, verify that all software is up to date, as outdated versions can cause communication errors. Refer to the manual for detailed troubleshooting steps, and if issues remain unresolved, contact Simrad support for further assistance. Always ensure external devices are properly configured and compatible with the GO7 system.

8.2 Fixing Sonar Malfunctions

If the sonar on your Simrad GO7 is not functioning correctly, start by checking the transducer connection and ensuring it is properly aligned. Restart the device to reset the system; If issues persist, verify that the sonar settings are correctly configured. Update the software to the latest version, as outdated firmware can cause malfunctions. Consult the manual for detailed troubleshooting steps or contact Simrad support for professional assistance. Regular software updates and proper configuration are key to maintaining optimal sonar performance.

8.3 Addressing Software Glitches

If you encounter software glitches with your Simrad GO7, restart the device to reset the system. Ensure your software is up to date by downloading the latest version from simrad-yachting.com. If issues persist, perform a factory reset via the settings menu. Be sure to back up your data before resetting. For unresolved problems, contact Simrad support for professional assistance. Regular updates and proper maintenance are crucial for optimal performance and to avoid software-related malfunctions.

Maintenance and Care for the Simrad GO7

Regularly clean the GO7 screen with a soft cloth and avoid harsh chemicals. Store the device in a dry place when not in use. Ensure proper care to maintain its performance and longevity.

9.1 Cleaning the Screen and Exterior

Use a soft, dry cloth to clean the Simrad GO7 screen and exterior. Avoid harsh chemicals or abrasive materials, as they may damage the display. Regularly wipe down the exterior to remove dirt, salt residue, or moisture. For stubborn stains, dampen the cloth with fresh water, but ensure it’s thoroughly wrung out. Avoid direct sunlight during cleaning to prevent streaks. Never use paper towels or rough fabrics, as they can scratch the screen. Proper cleaning maintains the device’s durability and ensures optimal performance in marine conditions.

9.2 Updating Software Regularly

Regular software updates are crucial for maintaining the Simrad GO7’s optimal performance and security. To update, access the settings menu or visit simrad-yachting.com for the latest version. Ensure the device is connected to a power source during the update to prevent interruptions. Updating enhances features, fixes bugs, and improves overall functionality. Always follow the on-screen instructions carefully to complete the update successfully. Keeping your GO7 updated ensures you have the latest advancements in sonar, GPS, and radar technologies.

9.3 Storing the Device Properly

Proper storage is essential to maintain the Simrad GO7’s durability and functionality. Store the device in a dry, cool place, away from direct sunlight and extreme temperatures. Use a protective cover to prevent dust and moisture exposure. Avoid submerging the unit in water or exposing it to harsh chemicals. For long-term storage, disconnect the battery to preserve its lifespan. Ensure the device is clean and free from corrosion before storing. Regularly check the storage conditions to maintain optimal preservation of your GO7.

The Simrad GO7 user manual provides essential guidance for maximizing your device’s potential. By following the outlined steps and tips, you can ensure optimal performance and longevity of your GO7.

10.1 Summary of Key Features

The Simrad GO7 offers a range of advanced features, including touchscreen functionality, CHIRP sonar for precise depth readings, and GPS navigation for accurate chart plotting. It also supports radar integration, fish detection, and weather overlays, enhancing your boating experience. The device features a built-in PDF viewer for easy access to manuals and guides. These capabilities make the GO7 a versatile and powerful tool for marine navigation and fishing, ensuring efficiency and reliability on the water.

10;2 Final Tips for Effective Use

To maximize your experience with the Simrad GO7, ensure regular software updates for optimal performance. Familiarize yourself with the touchscreen interface for smooth navigation. Utilize the built-in PDF viewer to access manuals and guides quickly. Customize display settings to suit your preferences and environmental conditions. Regularly clean the screen to maintain clarity. Store the device properly when not in use to preserve its durability. By following these tips, you’ll enhance your overall experience and make the most of the GO7’s advanced features.

Additional Resources

Explore additional resources like customer support, online tutorials, and the official Simrad website for comprehensive guidance and updates on your GO7 device.

11.1 Downloading the Latest Manual

To ensure you have the most up-to-date information, download the latest Simrad GO7 user manual from the official Simrad Yachting website at simrad-yachting.com. The manual is regularly updated to reflect new software releases and features. You can access it directly from the site or through the GO7’s built-in PDF viewer. This ensures you have the latest guidance for optimal device performance and troubleshooting. Regular updates help maintain compatibility with the latest software and hardware enhancements.

11.2 Contacting Simrad Support

For assistance with your Simrad GO7, contact Simrad Support through their official website. You can reach them via phone, email, or online chat for technical help and troubleshooting; Visit simrad-yachting.com and navigate to the support section for contact details. Additionally, you can sign up for personalized communications to receive updates, promotions, and tips tailored to your needs. Their customer service team is available to address any queries or issues you may have with your device.

11.3 Exploring Online Tutorials

Simrad offers online tutorials to help you master the GO7 device. These resources, available on simrad-yachting.com, provide step-by-step guides and video instructions. Tutorials cover installation, operation, and customization, ensuring you maximize the device’s potential. From understanding CHIRP sonar to navigating charts, these tools enhance your learning experience. Explore the tutorials to improve your proficiency with the GO7 and make the most of its advanced features for a seamless boating experience.

Warranty and Support Information

Understand your warranty coverage and access dedicated support through Simrad’s customer service. Locate authorized service centers for professional assistance, ensuring your GO7 remains in optimal condition;

12.1 Understanding the Warranty

Your Simrad GO7 is backed by a comprehensive warranty program. The warranty covers manufacturing defects for a specified period, ensuring your device remains reliable. Proper installation and usage are required to maintain warranty validity. Exclusions may apply for misuse or unauthorized modifications. For detailed terms and conditions, refer to the official documentation or contact Simrad support directly. Understanding your warranty ensures peace of mind and protects your investment in the GO7.

12.2 Reaching Customer Service

For assistance with your Simrad GO7, contact customer service directly through the official Simrad website or phone support. Visit simrad-yachting.com for detailed contact information and support options. Ensure you have your device details ready for efficient service. Customer service is available to address inquiries, provide troubleshooting guidance, and assist with warranty-related matters. Reaching out to customer service ensures you receive official support tailored to your needs, helping you resolve issues quickly and effectively with your GO7 device.

12.3 Finding Authorized Service Centers

To locate an authorized service center for your Simrad GO7, visit the official Simrad website at simrad-yachting.com. Use the “Service Center Locator” tool to find certified providers near you. Ensure your device is serviced by authorized centers to maintain warranty validity and receive genuine parts. Authorized centers guarantee expertise in repairing and maintaining your GO7, ensuring optimal performance and longevity. Always verify the center’s authorization status before proceeding with any service or repairs for your device.

biofinity multifocal contact lenses fitting guide

Biofinity Multifocal lenses offer clear vision at all distances, combining Balanced Progressive Technology for a natural transition between near, intermediate, and far vision, with breathable material for lasting comfort.

Overview of Biofinity Multifocal Lenses

Biofinity Multifocal contact lenses are designed to address presbyopia and astigmatism, offering a seamless transition between near, intermediate, and far vision. Utilizing Balanced Progressive Technology, these lenses provide a natural visual experience. Made from breathable material, they ensure comfort and hydration throughout the day. The fitting process emphasizes binocular vision assessment and avoids phoropter use, focusing instead on handheld lenses or a flipper for optimization. With a wide range of parameters, Biofinity Multifocal lenses cater to diverse prescriptions, making them a versatile option for patients. They are particularly recommended for early presbyopes and those seeking clear, comfortable vision without sacrificing convenience. Proper fitting is crucial for optimal performance and patient satisfaction.

Importance of Proper Fitting

Proper fitting of Biofinity Multifocal lenses ensures optimal visual clarity and comfort. Incorrect fitting can lead to vision problems, eye strain, and discomfort. A precise fit begins with a comprehensive eye examination, including refraction and verification of eye dominance. Assessing binocular vision and near vision is critical to tailor the lenses to the patient’s specific needs. Using handheld lenses or a flipper allows for accurate adjustments without relying on a phoropter. A well-fitted lens minimizes adaptation time and maximizes satisfaction, especially for presbyopes and those with astigmatism. Regular follow-ups ensure long-term comfort and address any emerging issues promptly. Proper fitting is essential for a successful experience with Biofinity Multifocal lenses.

Key Features of Biofinity Multifocal Lenses

Biofinity Multifocal lenses feature Balanced Progressive Technology for seamless vision transitions, breathable material for comfort, and a spherical design for accurate centration, ensuring sharp vision at all distances.

Balanced Progressive Technology

Biofinity Multifocal lenses utilize Balanced Progressive Technology, designed to provide smooth transitions between near, intermediate, and far vision. This technology ensures minimal visual disruption, allowing wearers to adapt easily. The lens features a unique zone progression that optimizes visual clarity at all distances, addressing presbyopic needs effectively. With a focus on patient comfort and optical precision, Balanced Progressive Technology enhances depth perception and reduces eye strain. This innovative design makes it easier for presbyopes to switch between tasks without compromising visual acuity, offering a natural and comfortable wearing experience.

Material and Comfort

Biofinity Multifocal lenses are crafted from a high-performance silicone hydrogel material, ensuring exceptional breathability and moisture retention for all-day comfort. The lens design maintains a high water content, which helps keep eyes hydrated and comfortable, even during extended wear. This advanced material promotes oxygen flow, reducing the risk of irritation and dryness. The smooth surface of the lens minimizes friction with the eye, enhancing wearer comfort. Designed for monthly replacement, Biofinity Multifocal lenses are an excellent choice for individuals seeking durable, comfortable lenses that meet the demands of daily use while maintaining clear vision at all distances.

Available Parameters and Options

Biofinity Multifocal lenses offer a wide range of parameters to suit diverse patient needs, making them a versatile choice for eye care professionals. With multiple options in sphere, cylinder, and axis for toric versions, these lenses cater to various prescriptions, including astigmatism. The extensive range of powers ensures accurate fitting for both nearsighted and farsighted individuals. Additionally, the lenses are available in different diameters to accommodate varying corneal sizes, ensuring a comfortable fit. This broad availability simplifies the fitting process, allowing practitioners to tailor the lenses to each patient’s unique requirements, enhancing both vision and comfort effectively.

Preparation for Fitting

Ensure a comprehensive initial consultation, including patient history, refraction, and verification of eye dominance, to prepare for a successful Biofinity Multifocal lens fitting experience.

Initial Consultation and Patient History

The initial consultation involves gathering detailed patient history, including previous contact lens use, medical conditions, and visual needs. This step ensures personalized fitting and addresses any concerns early, improving outcomes for Biofinity Multifocal lenses. Discussing lifestyle and visual preferences helps tailor the fitting process, while noting any previous eye surgeries or allergies is crucial. A thorough review of the patient’s ocular health and refractive needs sets the foundation for a successful fitting experience. This comprehensive approach ensures that the Biofinity Multifocal lenses are suited to the patient’s unique requirements, enhancing comfort and visual clarity across all distances.

Refraction and Verification of Eye Dominance

Accurate refraction is essential to determine the patient’s spherical equivalent for the distance prescription, ensuring proper lens selection. Verification of eye dominance is critical, as it influences how the brain processes visual information. Techniques like the fogging method may be used to identify the dominant eye. This step ensures the lenses are aligned with the patient’s visual system, optimizing near, intermediate, and far vision. Proper refraction and eye dominance assessment are foundational for a successful fitting, allowing for tailored adjustments and maximizing visual clarity with Biofinity Multifocal lenses. This process ensures the lenses meet the patient’s specific needs, promoting comfort and clear vision at all distances.

Assessing Binocular Vision

Assessing binocular vision is crucial to ensure both eyes work together effectively with Biofinity Multifocal lenses. This step evaluates how the lenses interact with the patient’s binocular system, ensuring clear and balanced vision at all distances. The patient should keep both eyes open during the assessment to simulate real-world conditions. Using handheld lenses or a flipper allows for precise optimization of near and intermediate vision. Avoiding the phoropter ensures a more natural assessment of the patient’s visual system. Proper binocular vision assessment guarantees that the lenses are tailored to the patient’s specific needs, enhancing comfort and visual clarity. This step is vital for achieving optimal results with multifocal lenses.

The Fitting Process

Assessing binocular vision ensures both eyes work together effectively with Biofinity Multifocal lenses. Evaluate vision with both eyes open to simulate real-world conditions. Use handheld lenses or a flipper for precise optimization of near and intermediate vision. Avoid using a phoropter for a more natural assessment. This step ensures the lenses are tailored to the patient’s specific needs, enhancing comfort and visual clarity. Proper binocular vision assessment is vital for achieving optimal results with multifocal lenses, ensuring seamless transitions between different visual tasks and distances. This step is critical for patient satisfaction and successful lens adaptation. It ensures balanced and clear vision in all scenarios.

Step 1: Evaluate Visual Acuity

Evaluating visual acuity is the first crucial step in the fitting process for Biofinity Multifocal lenses. Begin by assessing binocular visual acuity to determine how well the patient can see with both eyes open. This step ensures that the lenses will provide clear and balanced vision in real-world conditions. Use handheld lenses or a flipper to optimize near and intermediate vision, avoiding the use of a phoropter for a more natural assessment. Proper evaluation of visual acuity helps in selecting the right lens parameters, ensuring the lenses meet the patient’s specific needs. This step is essential for achieving optimal visual clarity and patient satisfaction, laying the foundation for a successful fitting process.

Step 2: Selecting the Distance Prescription

Selecting the correct distance prescription is a critical step in fitting Biofinity Multifocal lenses. Start with a new refraction to ensure accurate measurements, focusing on the spherical equivalent of the patient’s prescription. This step ensures that the lenses will provide clear distance vision while maintaining balance for near and intermediate vision. Use the fogging technique to verify eye dominance, which helps in tailoring the prescription to the patient’s specific needs. Properly selecting the distance prescription ensures that the multifocal design can effectively transition between distances, offering seamless vision for patients. This step sets the foundation for optimizing near and intermediate vision in subsequent steps, ensuring a successful fitting process tailored to the patient’s lifestyle and visual demands.

Step 3: Trial Lens Selection and Optimization

After determining the distance prescription, select trial lenses based on the patient’s specific needs and refractive error. Use handheld lenses or a flipper to optimize the prescription, ensuring proper balance between near, intermediate, and far vision. Avoid using a phoropter, as it may not accurately represent the multifocal design. Assess near and intermediate vision by having the patient perform tasks like reading or looking at objects at mid-distance. Adjust the lenses as needed to ensure comfort and clarity. Patient feedback is crucial at this stage to fine-tune the fit and ensure the lenses meet their lifestyle demands. This step ensures the lenses are tailored to the patient’s unique visual requirements, maximizing overall satisfaction and performance.

Verification and Optimization

Verify near, intermediate, and far vision using handheld lenses or a flipper; Ensure clarity and comfort, adjusting as needed for optimal performance.

Assessing Near and Intermediate Vision

Assessing near and intermediate vision is crucial for ensuring the lenses meet the patient’s needs. Begin by evaluating clarity at near distances, typically 40 cm, under normal room lighting. Use trial lenses or a flipper to refine the prescription, ensuring smooth transitions between distances. Test intermediate vision, such as reading a computer screen, to confirm comfort and clarity. Pay attention to any visual disturbances or adaptation issues. Balanced Progressive Technology helps maintain focus across all distances, minimizing blur. Adjustments may be necessary to optimize performance, ensuring the patient can perform daily tasks effortlessly. This step ensures the lenses provide practical, real-world benefits.

  • Evaluate near vision at 40 cm.
  • Test intermediate vision for clarity.
  • Use trial lenses or a flipper for refinement.

Using Handheld Lenses or a Flipper

Handheld lenses or a flipper are essential tools for refining multifocal lens prescriptions. They allow precise adjustments to optimize near and intermediate vision without relying on a phoropter. By maintaining binocular vision, these tools help assess how the lenses perform in real-world conditions. Begin by having the patient view a near target, such as reading material, and adjust the lenses to achieve clarity. Flip the lenses to compare different powers and ensure smooth transitions. This method ensures the patient’s visual needs are met effectively, promoting comfort and satisfaction with the Biofinity Multifocal lenses.

  • Evaluate vision with both eyes open.
  • Adjust lenses to optimize near and intermediate clarity.
  • Avoid using a phoropter for accurate results.

Avoiding the Use of a Phoropter

Avoid using a phoropter during the fitting process for Biofinity Multifocal lenses, as it can interfere with the patient’s ability to adapt to the multifocal design. Instead, rely on handheld lenses or a flipper to assess and refine the prescription; This approach allows for a more natural evaluation of binocular vision and ensures the patient’s visual needs are met in real-world conditions. By keeping the patient’s eyes open during the process, you can better optimize near and intermediate vision, leading to a more accurate and comfortable fit.

  • Avoid using a phoropter to prevent interference with multifocal adaptation.
  • Use handheld lenses or a flipper for precise adjustments.
  • Keep the patient’s eyes open to assess binocular vision naturally.
  • This method ensures accurate and comfortable lens performance.

Patient Adaptation and Follow-Up

Patient adaptation and follow-up are crucial for ensuring comfort and satisfaction with Biofinity Multifocal lenses. Educate patients on proper lens care and schedule follow-ups to address any concerns.

  • Educate patients on lens care and handling.
  • Schedule follow-up appointments to monitor adaptation.
  • Address patient feedback and make necessary adjustments.

Educating the Patient on Lens Care

Educating patients on proper lens care is essential for maintaining eye health and ensuring the longevity of Biofinity Multifocal lenses. Emphasize the importance of proper hygiene, such as washing hands before handling lenses and avoiding the use of tap water. Teach patients to clean and store lenses in the recommended solution and replace them as prescribed. Highlight the need to avoid sharing lenses or using expired care products. Encourage patients to attend follow-up appointments to address any concerns and confirm proper adaptation. Providing clear, step-by-step instructions ensures patients can manage their lenses effectively and safely, promoting optimal vision and comfort.

  • Proper handwashing before lens handling.
  • Using recommended cleaning and storage solutions.
  • Avoiding tap water and expired products.
  • Replacing lenses as prescribed.

Scheduling Follow-Up Appointments

Scheduling follow-up appointments is crucial for ensuring the success of Biofinity Multifocal lens adaptation. Typically, the first follow-up is scheduled within one week of lens fitting to assess comfort and vision clarity; A second follow-up is recommended after one month to evaluate long-term adaptation and address any adjustments needed. During these appointments, the practitioner can verify if the lenses are meeting the patient’s needs and make necessary modifications to the prescription or fitting parameters. Consistent follow-ups help identify and resolve any issues promptly, ensuring optimal vision and comfort. They also provide an opportunity to reinforce proper lens care and handling practices, which are essential for maintaining eye health and extending the life of the lenses.

  • Initial follow-up within one week.
  • Second follow-up after one month.
  • Assessment of comfort and vision.
  • Potential adjustments to prescription or fit.

Addressing Patient Feedback and Adjustments

Patient feedback is essential for refining the fitting process of Biofinity Multifocal lenses. After initial adaptation, patients may report challenges with near, intermediate, or distance vision, which guide necessary adjustments. Practitioners should listen carefully to concerns, such as blurry vision or discomfort, and use handheld lenses or flippers to fine-tune the prescription. Adjustments may involve modifying the power, axis, or cylinder to better align with the patient’s visual needs. Open communication ensures the lenses meet the patient’s lifestyle demands, improving satisfaction and wearer experience.

  • Assess patient-reported challenges in vision.
  • Use trial lenses to refine the prescription.
  • Ensure comfort and visual clarity at all distances.

Common Fitting Challenges

Common challenges include addressing presbyopic needs, managing astigmatism with toric multifocal lenses, and troubleshooting vision problems like blurry near or intermediate vision;

  • Presbyopia management.
  • Astigmatism correction.
  • Vision clarity issues.
  • Addressing Presbyopic Needs

    Biofinity Multifocal lenses are designed to address presbyopia by providing clear vision at all distances. The Balanced Progressive Technology ensures a smooth transition between near, intermediate, and far vision, reducing eye strain. For early presbyopes, the lenses can be fitted using the distance spherical equivalent prescription, simplifying the process. Assessing near vision is crucial, and using handheld lenses or a flipper helps optimize the fit. Eye dominance verification, often done with the fogging technique, ensures proper lens alignment. The lenses’ breathable material enhances comfort for extended wear, making them suitable for patients with presbyopia who require consistent visual clarity. Regular follow-ups are recommended to ensure optimal adaptation and address any adjustments needed for long-term satisfaction.

    Managing Astigmatism with Toric Multifocal Lenses

    Biofinity Toric Multifocal lenses are specifically designed to address astigmatism while providing clear vision at all distances. These lenses combine the benefits of multifocal and toric technologies, ensuring sharp vision for patients with astigmatism and presbyopia. Proper fitting involves precise measurement of the cylinder axis and power to maintain correct lens rotation. The Balanced Progressive Technology enhances visual clarity across all focal points. For optimal results, assess the patient’s binocular vision and ensure proper alignment during the fitting process. Follow-up appointments are crucial to verify lens performance and make any necessary adjustments for long-term comfort and satisfaction. This approach ensures patients with astigmatism can enjoy seamless vision correction with minimal adaptation time.

    Troubleshooting Vision Problems

    When fitting Biofinity Multifocal lenses, common issues such as blurry near or intermediate vision or eye strain may arise. To address these, ensure the lenses are properly fitted and aligned. Verify the prescription accuracy and consider over-refraction if needed. Check for correct lens orientation, especially in toric multifocal lenses. If vision remains unclear, trial lenses or a flipper can help optimize the fit. Avoid using a phoropter, as it may not accurately represent the patient’s real-world experience. Encourage patients to adapt gradually and provide guidance on lens care. Follow-up appointments are essential to address any persistent issues and make necessary adjustments for optimal visual comfort and clarity.

    Biofinity Multifocal lenses offer a tailored solution for presbyopic patients, combining advanced technology with comfort. Proper fitting and patient education ensure optimal results, enhancing daily vision and satisfaction.

    Best Practices for Successful Fittings

    For successful Biofinity Multifocal fittings, start with a comprehensive initial consultation, including refraction and verification of eye dominance using the fogging technique. Assess binocular vision to ensure proper alignment and balance. During the fitting process, evaluate visual acuity at all distances and use handheld lenses or a flipper to optimize near and intermediate vision. Avoid using a phoropter, as it can interfere with the natural adaptation process. Emphasize patient education on lens care and adaptation, scheduling follow-up appointments to address any concerns. Proper fitting and personalized adjustments are key to maximizing patient satisfaction and ensuring clear, comfortable vision at all distances.

    The Role of Balanced Progressive Technology in Patient Satisfaction

    Balanced Progressive Technology in Biofinity Multifocal lenses is designed to provide seamless vision at all distances. By optimizing the transition between near, intermediate, and far vision, this technology minimizes visual disturbances and enhances clarity. Patients report higher satisfaction due to the natural adaptation and ease of use. The technology ensures that each zone of the lens works harmoniously, reducing eye strain and adapting to the wearer’s needs. This innovation is particularly beneficial for presbyopes and individuals with active lifestyles, offering sharp vision in various lighting conditions. The result is a more comfortable and visually efficient experience, contributing significantly to patient satisfaction and loyalty to Biofinity lenses.